

If you’re looking for a show-stopping dessert that’s as fun to make as it is to eat, a Cookie Monster cake is the perfect choice. Inspired by the lovable and mischievous character from Sesame Street, this vibrant blue cake is a crowd-pleaser at any kids’ party, birthday celebration, or special event. Whether you’re a beginner baker or an experienced cake decorator, creating a Cookie Monster cake allows you to get creative with colors, textures, and decorations—especially with his iconic cookie-filled eyes!
In this post, we’ll dive into five amazing Cookie Monster cake tutorials that will make your dessert the star of the party. From beginner-friendly recipes to more advanced techniques using fondant and cookies, you’ll find a tutorial to suit your skill level and add a fun, edible touch to your next celebration. So, grab your baking tools, and let’s get started on crafting the ultimate Cookie Monster cake!
Table of Contents
Classic Cookie Monster Cake Tutorial for Beginners

Overview of the recipe
Making a Cookie Monster cake is surprisingly simple, even if you’re new to baking! This beginner-friendly recipe breaks down the process into manageable steps, ensuring that anyone can achieve a fun and delicious result.
In this tutorial, we’ll be using a basic cake mix as the foundation, making it easy and fast to create the perfect cake base. You’ll also need buttercream frosting, which is easy to make from scratch or you can opt for store-bought frosting if you’re short on time. The key to this recipe is the vibrant blue color of the frosting, which gives the cake its signature look and ties it to the lovable Sesame Street character.
For the decorations, the classic Cookie Monster face is created using two large Oreo cookies for the eyes, and a bit of black icing to form the mouth. You’ll also use extra crumbs or mini cookies to place around the cake to resemble the cookies Cookie Monster loves so much!
Ingredients Overview:
- Cake Base: You’ll need a box of cake mix (or homemade cake batter) in your preferred flavor—vanilla or chocolate works best for this tutorial.
- Buttercream Frosting: You’ll create a smooth, fluffy buttercream using butter, powdered sugar, and a splash of vanilla extract. We’ll be tinting it with a vibrant blue food coloring to give it that iconic Cookie Monster color.
- Decorations: Two large Oreo cookies for the eyes (you can also use edible eyes if you prefer), mini chocolate chip cookies, and black icing to form the mouth.
Key Steps:
- Bake the Cake: Begin by preparing the cake mix according to the instructions on the box or your homemade recipe. Once baked, allow it to cool completely.
- Prepare the Buttercream: Make your buttercream by beating butter, powdered sugar, and vanilla extract together. Add a little blue food coloring to achieve the perfect Cookie Monster blue.
- Frost the Cake: Frost the entire cake with the blue buttercream, ensuring it’s smooth and even. Use a spatula to give it a clean finish.
- Add the Features: Place the Oreo cookies as eyes, using black icing to draw Cookie Monster’s mouth. Add mini cookies around the base of the cake for extra detail.
By following this simple recipe, you’ll end up with a fun, playful Cookie Monster cake that looks just like the character we all know and love—perfect for any birthday party or themed event!
Ingredients you’ll need
Before you begin making your Cookie Monster cake, it’s essential to have all the right ingredients on hand. This cake is made with simple, easy-to-find ingredients that give it a fun, vibrant look and delicious flavor. Whether you choose a store-bought cake mix or bake from scratch, you’ll be creating a delightful treat that’s sure to impress! Here’s a breakdown of everything you’ll need for the cake, frosting, and decoration:
1. Cake Base
For the cake itself, you can either use a store-bought cake mix or bake from scratch. If you’re a beginner, a cake mix is the quickest option, and it guarantees a soft, moist cake every time.
- Boxed Cake Mix (or homemade cake batter): You’ll need one box of cake mix (any flavor you like, but vanilla and chocolate are the most popular choices for a Cookie Monster cake). This is the base of your cake, and you’ll follow the instructions on the box for ingredients (usually eggs, oil, and water) to prepare the batter.
- Tip: If you want a more customized flavor, consider adding a teaspoon of vanilla extract or almond extract to your batter.
2. Buttercream Frosting
The bright blue frosting that covers the entire cake is what truly brings this Cookie Monster cake to life. Buttercream frosting is easy to make and can be flavored or colored however you like. Here’s what you’ll need:
- Unsalted Butter: You’ll need about 1 cup (2 sticks) of softened unsalted butter. Using unsalted butter allows you to control the sweetness and balance the flavors in your frosting.
- Powdered Sugar: Around 4 cups of powdered sugar (also known as confectioners’ sugar) will give your frosting the right consistency—smooth and spreadable, but stiff enough to hold its shape.
- Vanilla Extract: A teaspoon of vanilla extract adds flavor to the frosting.
- Blue Food Coloring: The signature blue color of Cookie Monster requires a generous amount of blue food coloring. Gel food coloring is ideal, as it provides a rich, vibrant color without altering the frosting’s texture.
- Tip: Start with a few drops of blue food coloring, then add more until you achieve the desired shade of blue. Keep in mind that the color will deepen slightly as the frosting sets.
3. Decorations: Cookie Monster’s Face
For more advanced decorating techniques, watch these helpful tutorials from Cakeflix, a great resource for cake decorators of all skill levels.
The fun part of this cake is decorating it to resemble the beloved Cookie Monster! You’ll need a few specific ingredients to create his iconic features:
- Oreos (or other sandwich cookies): You’ll need two full-size Oreo cookies for Cookie Monster’s eyes. If you’re not a fan of Oreos, you can substitute them with other round sandwich cookies (like chocolate or vanilla).
- Tip: Make sure to use the cream-filled Oreos—these will serve as the eyes for your Cookie Monster cake.
- Mini Chocolate Chip Cookies: These cookies will serve as Cookie Monster’s favorite snack, scattered around the cake. You can either use mini cookies or break regular-sized cookies into smaller pieces. Alternatively, you can use cookie crumbs around the base of the cake for a textured, fun look.
- Tip: If you want to add extra flair, you can use bite-sized cookies, like Chips Ahoy, or even bake your own mini cookies from scratch.
- Black Icing (or edible markers): You’ll need black icing to create Cookie Monster’s mouth. If you don’t want to pipe the mouth, you can use black edible food markers for a cleaner look.
- Tip: A piping bag with a small round tip will give you more control over the shape of the mouth. For a fun twist, you could even make Cookie Monster “licking” his lips by having the mouth curl upward!
4. Optional Extras
While not necessary, there are a few optional ingredients you can add to elevate your Cookie Monster cake:
- Coconut Flakes: For a textured effect, you can sprinkle shredded coconut around the base of the cake to mimic fur. Simply toast the coconut for a more realistic “fuzzy” look.
- Edible Eyes: If you prefer to use pre-made edible eyes, they’re an easy substitute for the Oreo cookies. You can find them at cake decorating stores or online.
- Fondant: If you’re feeling a bit more adventurous, you could use fondant to create a smoother, more polished surface on your cake. This would also allow you to create more detailed facial features, like Cookie Monster’s expression, with precision.
Summary of Ingredients:
- Cake Base: 1 box of cake mix (or homemade batter), eggs, oil, and water (as per the instructions on the box).
- Frosting: 1 cup unsalted butter, 4 cups powdered sugar, 1 teaspoon vanilla extract, and blue food coloring.
- Decoration: 2 Oreo cookies for the eyes, mini chocolate chip cookies for decoration, and black icing for the mouth.
- Optional Extras: Shredded coconut for texture, edible eyes, or fondant for a more refined look.
By gathering these ingredients, you’ll be well on your way to creating a vibrant and fun Cookie Monster cake that’s sure to steal the show at your next event. With easy-to-follow steps and simple ingredients, you’ll have a cake that looks just like the iconic character from Sesame Street, making it perfect for kids’ parties, birthday celebrations, or just a fun baking project!
Step-by-Step Instructions
Now that you have all your ingredients ready, it’s time to dive into the fun part—baking and decorating your Cookie Monster cake! This simple step-by-step guide will help you create a perfect, playful dessert, even if you’re a beginner baker. Let’s walk through the process of baking, frosting, and decorating your cake like a pro.
Step 1: Prepare and Bake the Cake Base
- Preheat the Oven: Start by preheating your oven to the temperature indicated on the cake mix box or your homemade cake recipe (usually 350°F / 175°C). This ensures the oven is at the right temperature before you place your cake in.
- Prepare the Cake Batter: If you’re using a store-bought cake mix, follow the instructions on the box. You’ll usually need eggs, oil, and water to make the batter. Whisk the ingredients together in a large mixing bowl until everything is well combined. If you’re making the cake from scratch, be sure to sift your dry ingredients (flour, sugar, baking powder) before mixing them with the wet ingredients.
- Tip: Be careful not to over-mix your batter, as this can cause your cake to be dense rather than light and fluffy.
- Grease the Pan: Grease your cake pans with butter or cooking spray to ensure your cake doesn’t stick. You can also lightly dust the pans with flour, especially if you’re baking from scratch.
- Bake the Cake: Pour the cake batter evenly into the prepared cake pans. If you’re making a layered cake, you may need two 9-inch round cake pans. Place the pans in the oven and bake according to the instructions, usually 25-30 minutes, or until a toothpick inserted into the center comes out clean.
- Tip: If you’re unsure, check for doneness by lightly pressing the center of the cake—if it bounces back, it’s done!
- Cool the Cake: Once the cakes are baked, remove them from the oven and let them cool in the pans for 10 minutes. After that, transfer the cakes onto a wire rack to cool completely. It’s important that the cakes are fully cooled before you frost them, as warm cakes can melt the frosting and cause it to slide off.
Step 2: Make the Buttercream Frosting
- Cream the Butter: In a large bowl, beat the softened butter using an electric mixer on medium speed until it’s light and fluffy (about 2-3 minutes). This creates a smooth base for your frosting.
- Add the Powdered Sugar: Gradually add the powdered sugar, one cup at a time, mixing well after each addition. This helps prevent a sugar cloud from forming. Continue to beat until the frosting is thick and smooth.
- Add Vanilla Extract: Stir in the vanilla extract, which will give your buttercream a rich, warm flavor.
- Color the Frosting: Add the blue food coloring to the frosting. Start with a few drops and mix it in, adding more if necessary until you achieve the desired shade of Cookie Monster blue.
- Tip: Gel food coloring is best for this since it’s more concentrated and won’t alter the consistency of your frosting.
- Adjust the Consistency: If the frosting is too stiff, add a teaspoon of milk or cream to loosen it. If it’s too thin, add more powdered sugar to thicken it.
Step 3: Frost the Cake
- Level the Cakes: Once your cakes are completely cooled, you might want to level them by cutting off the domed tops using a serrated knife. This creates a flat surface for frosting and stacking.
- Tip: Save any cake scraps for decorating or snacking!
- First Layer of Frosting: Place one of the cake layers on your cake stand or serving plate. Using a spatula or an offset spatula, spread a thin layer of buttercream frosting over the top of the cake to create an even base layer.
- Stack the Layers: Place the second layer of cake on top of the first. If you want a taller cake, you can also stack more layers (just be sure to spread frosting between each layer).
- Crumb Coat: Apply a thin “crumb coat” of frosting to the entire cake to seal in any loose crumbs. This helps create a smooth final layer of frosting. Chill the cake for 15-30 minutes to allow the crumb coat to set.
- Final Coat of Frosting: Once the crumb coat has set, apply a thicker, smoother layer of blue frosting over the entire cake. Use a spatula to smooth the frosting as evenly as possible around the sides and top of the cake.
- Tip: You can use a bench scraper to get perfectly smooth sides, or create a fun texture with the spatula for a more playful look.
Step 4: Decorate Cookie Monster’s Face
- Create the Eyes: Place the two Oreo cookies near the top of the cake to form Cookie Monster’s eyes. You can press them lightly into the frosting so they stick.
- Draw the Mouth: Using black icing (or black food coloring in a piping bag), draw Cookie Monster’s mouth by piping an exaggerated wide grin just below the eyes. Make sure the mouth is large enough to be noticeable but still in proportion to the eyes.
- Add the Cookies: Decorate around the cake with mini chocolate chip cookies or cookie crumbs to complete the look. You can place a few cookies near the mouth, giving the impression that Cookie Monster is ready to devour them!
- Tip: If you want, you can also add extra fun details like cookie crumbs on the sides of the cake or place mini cookies around the base for extra texture.
Step 5: Serve and Enjoy!
- Final Touches: Take a step back and make sure your cake looks just like Cookie Monster! You can add some extra decorations like colorful sprinkles or more cookies if you like.
- Serve: Slice the cake carefully, ensuring the frosting and cookie details stay intact. Serve your playful creation at your next kids’ birthday party or celebration!
- Tip: If you want to get creative, you can even serve the cake with a side of milk to really channel Cookie Monster’s love for cookies!
Summary of Steps:
- Bake the Cake: Prepare and bake your cake layers, then allow them to cool completely.
- Make the Buttercream Frosting: Whip up the frosting with blue food coloring to create Cookie Monster’s signature look.
- Frost the Cake: Apply a crumb coat followed by a smooth, final layer of blue frosting.
- Decorate the Face: Use Oreo cookies for the eyes, black icing for the mouth, and mini cookies for added details.
- Serve and Enjoy: Slice the cake, serve, and enjoy the fun, delicious results!
Decorating Tips
Decorating your Cookie Monster cake is the most exciting part of the process! It’s where you get to bring the character to life and add your own creative spin. Whether you’re going for a simple look or something more elaborate, these decorating tips will help you achieve a professional-looking, fun, and Instagram-worthy cake. Plus, they’ll ensure your cake not only looks great but tastes delicious too!
1. Achieving Smooth, Even Frosting
One of the challenges of decorating a cake is getting a smooth, even coat of frosting. Here’s how you can achieve a professional-looking finish:
- Use a Crumb Coat: After stacking your cake layers, apply a thin layer of frosting (called a crumb coat) to seal in any loose crumbs. This layer should be just thick enough to cover the cake but not so thick that it makes the final layer uneven. Chill the cake for about 15-30 minutes to let the crumb coat set.
- Smooth the Frosting: For a smooth finish, apply the final coat of frosting generously over the cake. Use an offset spatula to spread the frosting evenly over the top and sides. For extra smoothness, dip your spatula into hot water, wipe it dry, and gently run it over the frosting to create a sleek finish.
- Tip: If you’re using buttercream, you can use a bench scraper to smooth the sides for a perfectly polished look.
2. Adding Cookie Monster’s Signature Eyes
The eyes are one of the most recognizable features of Cookie Monster, so it’s important to get them right. Here are some tips for making his eyes stand out:
- Use Oreos for a Realistic Look: Oreos are perfect for Cookie Monster’s eyes because they are large, round, and have the perfect contrast between the black cookie and white filling. Place them at the top of the cake, slightly apart, to create a playful expression. You can leave the cookies whole or remove the cream filling for a cleaner look.
- Piping a Border Around the Eyes: If you want a more detailed eye, you can use black or brown icing to pipe a border around the Oreo cookies to make them look even more lifelike. This adds depth and dimension to the eyes and can give them a more cartoon-like, expressive appearance.
- Edible Eyes Alternative: If you prefer a quicker option or need to save time, you can use edible candy eyes, which are available at cake decorating stores or online. These pre-made eyes are often a bit larger than Oreos and may give your cake a different, cute look.
3. Creating Cookie Monster’s Mouth
Cookie Monster’s big, goofy grin is iconic, and making the mouth stand out is essential to bringing the cake to life. Here’s how to make a great Cookie Monster smile:
- Piping the Mouth: Use black icing to pipe Cookie Monster’s mouth. You can use a piping bag with a small round tip (like a #2 or #3) to carefully pipe the mouth in the shape of a wide, open grin.
- Tip: Make the mouth exaggerated and playful for a more cartoonish look. If you want to give it a more whimsical feel, you can even have the mouth curve upward at the ends, making it appear as though Cookie Monster is excited to eat the cookies!
- Adding Cookie Crumbs: After piping the mouth, consider adding some mini chocolate chip cookies or cookie crumbs around it to create the illusion that Cookie Monster has just devoured a cookie. You can place cookies near the mouth or even on top of the cake for a fun, interactive touch.
- Fondant Option: If you prefer a smoother finish for the mouth, you can use black fondant. Roll out a small piece of fondant, cut it into the shape of a mouth, and place it on the cake. This method is great for creating a more polished look.
4. Decorating with Mini Cookies and Cookie Crumbs
Cookie Monster is famous for his love of cookies, so it makes sense to decorate your cake with plenty of cookies! Here are some ideas:
- Mini Chocolate Chip Cookies: Place mini chocolate chip cookies around the cake for an authentic Cookie Monster effect. You can scatter them on the sides of the cake, in the center, or even use them to create a “cookie pile” that Cookie Monster is “digging into.”
- Cookie Crumbs Around the Base: Crushed chocolate chip cookies or even crushed Oreos can be sprinkled around the base of the cake for a fun, textured look. This adds an extra layer of detail and helps tie the theme together. Plus, it gives the cake a rustic, homemade touch.
- Cookie Piles or “Cookie Trails”: For added whimsy, you can create little piles of cookies around the cake to make it look like Cookie Monster is munching away. You could also create a “cookie trail” leading off the cake, which is especially fun if you’re serving the cake at a themed party or event.
5. Adding Extra Texture and Detail
A Cookie Monster cake is already quite playful and vibrant, but adding a little extra texture and detail can really make it pop:
- Shredded Coconut: If you want a more textured, furry look for the cake, consider adding shredded coconut around the base or top of the cake. Lightly toast the coconut to give it a “fuzzy” effect, mimicking the texture of Cookie Monster’s fur.
- Tip: You can use a small amount of coconut around the bottom of the cake for a more subtle effect or cover the entire top if you want to create a more dramatic “fur” look.
- Sprinkles or Colored Sugar: Adding colorful sprinkles or colored sugar to the top of the cake or around the base can enhance the fun, playful vibe of the cake. Opt for blue, white, or brown sprinkles to match the Cookie Monster theme.
- Fondant Details: If you’re using fondant, you can cut out additional features like cookie crumbs, small round buttons, or even more details on the eyes and mouth to make Cookie Monster appear more three-dimensional.
6. Final Touches for a Perfect Finish
Before you call your cake done, take a moment to step back and make sure everything looks perfect. Here are a few last-minute tips:
- Take Time for Clean Edges: Smooth out any rough frosting areas with your spatula or a bench scraper. You want the edges of your cake to look neat and clean, especially if you’re using fondant or a smoother buttercream finish.
- Check Symmetry: Ensure that the placement of the Oreo eyes and cookies is balanced and looks good from all angles. You want Cookie Monster’s face to look centered and playful!
- Keep It Fun: Decorating a Cookie Monster cake is all about having fun, so don’t stress too much about perfection. A little imperfection will add to the charm and whimsy of the cake.
Summary of Decorating Tips:
- Smooth Frosting: Use a crumb coat to prevent crumbs from mixing into the final layer of frosting. Smooth the frosting with a spatula or bench scraper for a polished finish.
- Playful Eyes: Use Oreo cookies for Cookie Monster’s eyes, adding extra details with black icing for a realistic look.
- Exaggerated Mouth: Pipe a wide, goofy grin using black icing or fondant to create a fun, playful expression.
- Cookies Galore: Decorate with mini cookies or cookie crumbs to emphasize Cookie Monster’s love for cookies.
- Extra Texture: Consider adding shredded coconut, sprinkles, or fondant details for added texture and fun.
- Final Touches: Clean up any rough edges, ensure symmetry, and have fun with the decorating process!
Creative Cookie Monster Cake with Cookie “Eyes”

Tutorial focus
The Classic Cookie Monster Cake Tutorial is designed with beginners in mind, ensuring that anyone, whether a seasoned baker or someone just starting out, can create a fun and memorable dessert. The tutorial focuses on simplifying the baking and decorating process without compromising on the final look or taste. This focus is what makes the Cookie Monster cake both approachable and enjoyable for everyone involved.
Here’s why this tutorial is perfect for you and what it emphasizes:
1. Easy-to-Follow Steps for Beginners
The primary focus of this tutorial is making sure the steps are clear and simple for beginners. Baking and decorating cakes can seem overwhelming, especially if you haven’t done it before, but this guide breaks everything down into manageable steps. Whether you’re using a boxed cake mix or homemade batter, the instructions are straightforward, ensuring that your cake turns out delicious and fun—without requiring any specialized skills.
- Simplified Cake-Baking Process: Rather than focusing on complex cake techniques like layering fondant or baking from scratch, this tutorial uses a simple boxed cake mix (or easy homemade batter) and basic buttercream frosting. This approach keeps the baking process stress-free.
- Step-by-Step Guidance: The tutorial is broken into clear steps for baking, frosting, and decorating, with lots of tips for making each stage easier. For example, we guide you through the process of leveling your cake, applying a crumb coat, and achieving a smooth frosting finish—all of which are key to making the cake look polished and professional.
2. Fun and Playful Design
The Cookie Monster cake is designed to be visually striking while keeping things lighthearted and fun. Its playful design captures the essence of the beloved Sesame Street character, making it an ideal choice for kids’ birthday parties, themed events, or any celebration that needs a touch of whimsy. The focus here is on creativity, giving bakers the freedom to make the cake their own while still sticking to a recognizable, charming design.
- Character-Based Design: Cookie Monster is an instantly recognizable character with his big, googly eyes, wide grin, and love of cookies. This tutorial emphasizes how to recreate his face with just a few basic ingredients, making it easy for beginners to capture his fun, goofy personality.
- Decorating with Cookies: The inclusion of mini cookies and cookie crumbs around the cake is what makes this cake so fun and relevant to Cookie Monster’s character. Decorating with cookies is simple but adds a lot of personality, making this cake a hit at parties.
- Room for Personalization: While the tutorial provides a clear framework, it also encourages bakers to get creative. You can adjust the cake’s color, add additional cookie decorations, or even customize the face to make it unique.
3. Flexibility for Different Skill Levels
Although this tutorial is focused on beginners, it also allows for more experienced bakers to add their own flair. Whether you’re just starting out or have more cake-decorating experience, this tutorial provides enough room for you to adapt and make the cake as detailed as you’d like. For beginners, it offers simple tips to help them stay on track, while more advanced decorators can experiment with additional touches.
- Basic vs. Advanced Decorating: Beginners can follow the tutorial to create a simple version of the Cookie Monster cake by sticking to the Oreo eyes, basic black piping for the mouth, and mini cookies for decoration. More experienced bakers can experiment with fondant to refine the face, add more intricate decorations like cookie crumbs or coconut fur, or even create a multi-layered cake for a grander presentation.
- Choice of Ingredients: The tutorial allows you to customize ingredients based on your skill level and preferences. You can choose between making homemade buttercream or using store-bought, depending on how much time or effort you want to invest. If you’re feeling adventurous, you can even bake from scratch.
- Customizing the Look: While the tutorial walks you through the classic look of Cookie Monster, it also encourages you to play around with the design. You could make Cookie Monster’s eyes different sizes, try a fondant mouth instead of piped icing, or create a unique cookie selection that reflects your tastes.
4. Perfect for Any Occasion
One of the great things about this tutorial is its versatility. Whether you’re baking for a child’s birthday party, a Sesame Street-themed event, or a casual gathering with friends and family, this Cookie Monster cake works for any occasion. Its playful design appeals to both children and adults, making it a crowd-pleaser at any celebration.
- Kids’ Parties: The bright blue frosting and cartoonish design make this cake perfect for a kids’ birthday party or a Sesame Street-themed event. It’s fun to look at, delicious to eat, and sure to be a conversation starter.
- Themed Celebrations: Beyond birthdays, this cake also fits well into celebrations with a theme—like a Cookie Monster or Sesame Street-themed gathering, a Halloween party, or even a baby shower.
- Family Fun: Whether it’s for a family dinner or a casual get-together, this cake is easy to make and perfect for spreading joy, especially when everyone recognizes the lovable Cookie Monster.
5. Minimal Equipment and Ingredients Needed
This tutorial is focused on simplicity, and it requires minimal equipment and ingredients to achieve a stunning result. You don’t need fancy tools or hard-to-find ingredients to create the perfect Cookie Monster cake. With a few basic kitchen items and readily available ingredients, you can have a beautiful cake in no time.
- Basic Tools: The essential tools you need are basic cake-baking and decorating equipment: a spatula, offset spatula, piping bags (optional), and a cake stand or serving plate. If you don’t have a piping bag, you can also use a Ziploc bag with the corner cut off.
- Common Ingredients: The ingredients are all easily found at your local grocery store: cake mix (or ingredients for a homemade cake), butter, powdered sugar, food coloring, and cookies. These are all basic items that you likely already have in your kitchen or can easily pick up without the need for specialized baking supplies.
- No Special Baking Skills Required: You don’t need to know intricate cake decorating techniques to create a beautiful Cookie Monster cake. The tutorial emphasizes simple piping and easy-to-follow instructions, which make it accessible to anyone, even if they’ve never decorated a cake before.
Summary of Tutorial Focus:
- Beginner-Friendly: The tutorial offers easy-to-follow steps and simplified techniques, ensuring that even beginners can make a stunning cake.
- Fun and Playful Design: The focus on Cookie Monster’s face and the use of cookies for decoration make the cake both visually appealing and fun.
- Flexibility for Skill Levels: While the tutorial is geared toward beginners, it provides plenty of room for more advanced decorators to add their own creativity.
- Perfect for Any Occasion: The cake is versatile and works well for kids’ parties, themed celebrations, or casual family gatherings.
- Minimal Equipment and Ingredients: The tutorial is designed to be accessible, requiring only basic tools and easy-to-find ingredients.
Decorating with Cookies
One of the best parts about a Cookie Monster cake is incorporating actual cookies into the decoration! Not only do cookies tie into the character’s iconic love for cookies, but they also add texture, flavor, and whimsy to your cake design. In this section, we’ll explore several ways you can decorate your cake with cookies, from using them as the centerpiece to sprinkling them around for extra fun and detail. Whether you use mini cookies, full-sized ones, or cookie crumbs, there are endless possibilities for getting creative!
1. Using Oreo Cookies for Cookie Monster’s Eyes
The most iconic part of the Cookie Monster cake design is, of course, his eyes. Oreo cookies are the perfect choice for creating those large, expressive eyes, thanks to their size and color contrast.
- Place the Oreos as Eyes: Start by positioning two whole Oreo cookies near the top of your cake. Make sure they’re placed symmetrically, slightly apart from each other to create a wide-eyed look that’s characteristic of Cookie Monster’s always-hungry gaze.
- Leave the Cream Inside or Remove It: You can either leave the cream filling inside the Oreo cookies for a more traditional look, or you can remove it for a cleaner, more polished appearance. If you choose to remove the filling, you might want to use a little bit of frosting to adhere the cookies to the cake.
- Add Detail with Piping: If you want to elevate the eyes even further, use black icing or gel food coloring to pipe a thin black border around the Oreo cookie or around the cream center. This gives the eyes a more defined, cartoony look.
- Edible Alternatives: If you’re not a fan of Oreos or want something a bit different, consider using large, round white candies (like yogurt-covered pretzels or white chocolate-covered cookies) for the eyes. You can add black icing or candy melts for the pupils.
2. Creating Cookie Monster’s Mouth with Cookies
In addition to the eyes, Cookie Monster’s wide-open mouth is an essential part of his quirky design. Incorporating cookies into the mouth adds another layer of fun, mimicking Cookie Monster’s love of devouring cookies!
- Piping the Mouth with Icing: Begin by piping Cookie Monster’s smile with black icing in the shape of a wide grin, just below the Oreo eyes. You can pipe the mouth using a piping bag with a small round tip (such as a #2 or #3).
- Add Cookie “Chunks”: To emphasize Cookie Monster’s insatiable appetite, you can add small cookie pieces or whole mini cookies around the mouth area. Positioning mini cookies as if he’s about to eat them, or has already eaten them, creates a dynamic, fun effect. You can place cookies to the side of the mouth or scatter some inside the mouth for extra detail.
- Cookie Crumbs: To make the mouth appear even more realistic, add cookie crumbs around the edges or in the mouth area, as though Cookie Monster has just finished chomping down on a delicious snack.
- Cookie Pile: For an even more playful design, place a pile of mini cookies just beside or on top of Cookie Monster’s mouth, creating the impression that he’s surrounded by his favorite treat, just waiting to dive in.
3. Decorating the Cake with Mini Cookies and Cookie Crumbs
Mini cookies are a great way to add texture and detail to your Cookie Monster cake, making it look more like an edible cookie explosion!
- Mini Chocolate Chip Cookies: Scatter mini chocolate chip cookies around the base of the cake or on top to create a fun and whimsical “cookie garden.” You can also use mini cookies to form a pattern, like a cookie trail leading off the edge of the cake to make it look like Cookie Monster is leaving a mess of cookies in his wake!
- Cookie Crumbs for Texture: Another fantastic way to add dimension to your cake is by using cookie crumbs. You can crush some of your mini cookies and scatter the crumbs on the sides or top of the cake. This gives the cake a textured look and enhances the theme of Cookie Monster’s cookie obsession.
- Tip: For an even more rustic look, use a rolling pin to crush your cookies and create larger, more uneven crumbs that add a “realistic” feeling to the decoration. You can also sprinkle cookie crumbs around the bottom of the cake for a fun border.
- Layered Cookie “Piles”: If you want to go all-out with the cookie theme, create small piles of mini cookies stacked on top of each other. Place these cookie piles in various places on the cake, such as around the base, beside Cookie Monster’s face, or on top of the cake to give the appearance of Cookie Monster going crazy with his cookies.
4. Using Full-Sized Cookies for Cake Decoration
In addition to mini cookies, full-sized cookies can add a fun and dramatic touch to your cake design.
- Position Full Cookies as Cake Layers or Decorations: You can use full-sized cookies (such as chocolate chip cookies or giant sandwich cookies) as decorations around the perimeter of the cake. This can be done by placing them standing upright along the base of the cake, or by stacking them in a circular pattern around the top of the cake for a more intricate, eye-catching effect.
- Cookie Monster Holding a Cookie: For added flair, place a full-sized cookie in Cookie Monster’s “hands.” You can either pipe little hands using fondant or frosting, or position a mini cookie on top of the cake as if Cookie Monster is holding it. This adds a personalized and adorable touch to your cake’s design.
- Creating a Cookie Border: Full-sized cookies, such as chocolate chip cookies or sandwich cookies, can also be used to create a border around the base of the cake. This creates a fun, edible frame around the cake, making the entire dessert feel more interactive and themed.
5. Creative Cookie Placing for Extra Whimsy
The placement of cookies doesn’t have to be symmetrical or perfect—embracing randomness can actually enhance the playful, fun vibe of the Cookie Monster cake.
- Uneven Cookie Placement: Scatter the cookies around the cake in an uneven, haphazard manner to make it look like Cookie Monster has been snacking all around the cake. This adds to the fun and carefree aesthetic.
- Falling Cookies: For a playful effect, you can position some cookies at the edges of the cake as if they are “falling” off the cake. This gives the illusion that Cookie Monster has been so excited about his cookies that they’re tumbling everywhere!
- Cookie Monster in Action: You can also position cookies at various angles, creating the illusion that Cookie Monster is in the middle of a cookie-eating frenzy. Whether you scatter them in his mouth, on top of his face, or in random places on the cake, the chaos can add to the overall fun design.
Summary of Decorating with Cookies Tips:
- Oreo Cookies for Eyes: Use whole Oreos to create Cookie Monster’s eyes, and add black icing for more detail.
- Cookie Mouth and Crumbs: Pipe Cookie Monster’s wide-open mouth with black icing, and add mini cookies or cookie crumbs for texture and detail.
- Mini Cookies and Crumbs: Scatter mini chocolate chip cookies around the cake, or use crushed cookies to create texture and add whimsy.
- Full-Sized Cookies: Use full-sized cookies as cake decorations, or create a fun cookie pile to enhance the theme.
- Creative Cookie Placement: Have fun with how you place the cookies—position them randomly, let them “fall” off the edges, or even have Cookie Monster holding one!
DIY Cookie Monster Face
Creating a DIY Cookie Monster face is one of the most enjoyable and creative parts of this cake tutorial. Cookie Monster’s face is iconic, with his big, googly eyes, wide grin, and playful personality—elements that make him instantly recognizable and fun. By using a few simple tools and ingredients, you can replicate this lovable character right on top of your cake. Let’s break down how to build his face from scratch!
1. Shaping Cookie Monster’s Eyes
Cookie Monster’s eyes are one of the most important features when recreating his face on your cake. His large, expressive eyes are what give him his playful and mischievous look, so it’s essential to get these just right.
- Use Oreos for Realistic Eyes: Oreos are perfect for Cookie Monster’s eyes due to their round shape and the contrast between the black cookie and the white filling. Start by placing two whole Oreos near the top center of your cake. Space them slightly apart to achieve the “googly eye” look. If you prefer a cleaner look, remove the Oreo cream, but leaving it in makes the eyes pop more and adds depth.
- Piping the Pupils: To give the eyes more character and realism, use black icing to pipe small, round pupils in the center of each Oreo. You can use a small round piping tip, like #2 or #3, to create precise, neat dots. If you want the pupils to be off-center, you can adjust them to give Cookie Monster a more playful or mischievous expression.
- Alternative Eye Ideas: If you don’t want to use Oreos, you can make eyes using large white candies, marshmallows, or fondant. Simply roll out two balls of white fondant, flatten them slightly, and pipe or paint small black pupils in the center.
2. Building Cookie Monster’s Mouth
Cookie Monster’s open, wide mouth is central to his look—he’s always ready to devour a cookie! Here’s how to create his mouth and make it look just as fun and exaggerated as his character.
- Piping the Smile: Using black buttercream or royal icing, pipe a wide, exaggerated smile just beneath the eyes. Start by drawing a small curved line and then extend it outward, curving the ends up slightly. This creates Cookie Monster’s iconic, goofy grin. To make the smile more playful, you can slightly tilt the ends upward.
- Tip: If you’re using a piping bag, use a small round tip (like #2 or #3) for more control over the smile shape. You can also use a piping gel for a glossy finish, giving the smile a more realistic, wet appearance.
- Fondant for Extra Detail: For a smoother, more controlled look, you can cut out a mouth shape from black fondant and place it on the cake. This option will give you a cleaner, more defined edge for the mouth, especially if you want to create a perfect curved grin.
- Add Cookie “Chomp” Details: After piping the mouth, it’s fun to add a cookie or two to create the illusion that Cookie Monster is in the middle of munching. Mini chocolate chip cookies or broken cookie pieces can be placed around the mouth or even within it, as if he’s just about to devour them.
3. Making Cookie Monster’s Furry Texture
Cookie Monster is known for his shaggy blue fur, and recreating that texture on your cake will give it a fun, animated look. Here are some simple ways to achieve the “furry” effect using frosting.
- Use Blue Buttercream for the Fur: To make Cookie Monster’s blue fur, start by coloring your buttercream frosting with a vibrant blue gel food coloring. Once your buttercream is ready, use a small star tip (like Wilton #21 or #22) to pipe little bursts of frosting all over the cake’s surface. This technique will create the texture of fur.
- Tip: If you’re short on time or want a less textured look, you can simply smooth the frosting with an offset spatula, but for the “fur” effect, a star tip or small round tip works best.
- Piping the Fur: Focus on creating an even layer of frosting over the entire cake, but make sure the fur is a little more concentrated around Cookie Monster’s face. You can even add a few layers of fur to his “cheeks” or the areas around his mouth to make him look even fluffier.
- Shredded Coconut for Extra Texture: For added texture, consider sprinkling some shredded coconut on the cake after applying the blue frosting. You can lightly toast the coconut to give it a slightly golden, fluffy texture that mimics fur. This is optional but can really add a fun element to your design.
4. Adding Cookie Monster’s Cookie Details
The finishing touch to your Cookie Monster cake is, of course, his favorite snack: cookies! Adding these to your design not only brings the character to life but also ties the whole theme together.
- Mini Cookies for Decoration: As Cookie Monster is obsessed with cookies, placing mini cookies around his face and on top of the cake can emphasize his love for snacks. Use mini chocolate chip cookies, Oreos, or even homemade cookies, and arrange them around the edges of the cake or near his mouth to make it appear as if Cookie Monster is either holding them or about to eat them.
- Cookie Crumbs Around the Face: Scatter cookie crumbs around the base of the cake or around the mouth. This gives the impression that Cookie Monster has been munching away and adds an extra touch of realism. Crushed Oreos or chocolate chip cookies work best for this.
- Giant Cookie Pile: You can make the cookie detail more dramatic by stacking mini cookies on top of each other or by creating a “cookie pile” near Cookie Monster’s face. This adds to the playful chaos and helps create an interactive, fun feel for your cake. You can even use a few whole cookies to accentuate the larger pile.
5. Final Touches to Perfect Cookie Monster’s Look
Once you’ve created the basic structure of Cookie Monster’s face, it’s time to add any finishing touches that will take your cake to the next level. These little details will ensure your cake looks polished and professional while still maintaining its playful character.
- Clean Up the Edges: Use an offset spatula to smooth out any rough edges of the frosting. If you’ve made any cookie crumbs or frosting smudges around the edges of the cake, gently wipe them away with a damp paper towel. This will help your design appear neat and well-crafted.
- Enhance the Fur: For an extra pop, lightly press the back of a spoon into the fur to create more texture or definition, especially around the face and mouth. This will give the fur a slightly more varied and “spiky” look, just like Cookie Monster’s messy, fun appearance.
- Add Cookie Details: To make Cookie Monster look even more hungry, place a few crumbs inside his mouth, or use a little bit of frosting to make it look like he’s just bitten into a cookie. Small touches like these can enhance the theme and bring your cake to life.
Summary of DIY Cookie Monster Face Tips:
- Eyes: Use Oreos or fondant to create Cookie Monster’s eyes, adding black icing for pupils.
- Mouth: Pipe an exaggerated smile with black icing and add cookie details for a fun, realistic touch.
- Furry Texture: Create the fluffy, blue fur using a star tip and blue buttercream, or add toasted coconut for extra texture.
- Cookies: Decorate with mini cookies, cookie crumbs, or a “cookie pile” to emphasize Cookie Monster’s love for cookies.
- Final Touches: Clean up rough edges, enhance the fur for more texture, and add small cookie details to make the face pop.
Fun Variations
While the traditional Cookie Monster cake with blue buttercream fur and Oreo eyes is always a hit, you can take your cake to the next level by incorporating different flavors, decorations, and creative ideas that put a fun spin on the classic design. In this section, we’ll explore some exciting variations that will make your Cookie Monster cake stand out, whether you’re looking to adjust the flavor profile, enhance the design, or add an unexpected surprise inside the cake.
1. Flavored Buttercream Options
If you love the idea of creating a Cookie Monster cake but want to experiment with different flavors, you can easily switch up the buttercream or cake flavors. Here are some ideas to get you started:
- Chocolate Buttercream: Instead of the usual vanilla or classic buttercream, consider using chocolate buttercream to create a richer, more indulgent flavor. The dark brown color contrasts beautifully with the blue, and it pairs well with the cookie theme, especially if you’re using chocolate chip cookies as decoration. You can also use chocolate ganache for a more luxurious look and texture.
- Cookie Dough Buttercream: For a true Cookie Monster experience, why not create a cookie dough-flavored buttercream? Infuse your buttercream with edible cookie dough chunks or vanilla extract to mimic the taste of fresh cookie dough. This will give the frosting an extra layer of flavor that’s perfectly suited for a Cookie Monster cake.
- Mint Buttercream: If you’re a fan of mint, mint-flavored buttercream will give the cake a refreshing twist. The green color of mint buttercream can also create a beautiful contrast with the blue fur, giving your cake a playful and surprising look. Mint complements chocolate cookies, especially if you’re using mint-flavored ones like Thin Mints, to enhance the flavor profile.
- Peanut Butter Buttercream: For a nutty twist, use peanut butter buttercream for a savory contrast to the sweet cookie toppings. The creamy texture of the peanut butter adds a layer of depth, and the earthy flavor balances out the sweetness of the cake. It’s also perfect if you’re decorating with chocolate chip cookies, which pair wonderfully with peanut butter.
2. Cookie Variety Mix
While Oreos are the classic choice for Cookie Monster’s eyes and mouth, there are a ton of other cookies you can use to create a fun variation on this cake. Mixing different types of cookies not only adds flavor diversity but also enhances the overall visual appeal of your cake.
- Mini Chocolate Chip Cookies: Instead of using Oreos exclusively, you can opt for mini chocolate chip cookies for the eyes or even as decoration around the cake. Their smaller size makes them perfect for placement on the cake, and they add an extra chocolatey kick to every bite. You can even use mini chocolate chips to create a cookie crumb effect around the edges of the cake.
- Gingerbread Cookies: For a festive twist, especially around the holiday season, you can use gingerbread cookies as part of the decoration. Their spiced flavor adds a unique contrast to the traditional sweetness of the cake, and the brown color will look stunning alongside the blue and white elements of the design. Try using small gingerbread men cookies to line the edge of the cake or around Cookie Monster’s face.
- Sugar Cookies: Sugar cookies are another fantastic option because of their simplicity and versatility. You can use them for creating various shapes like hearts, stars, or even Cookie Monster’s cookie-shaped features. Sugar cookies also pair well with royal icing or fondant, making them easy to customize in different colors and designs.
- Chocolate-Dipped Cookies: For a gourmet touch, dip some of your cookies in melted chocolate (milk, dark, or white chocolate) and place them on the cake as decoration. This will not only enhance the look of your cake but also introduce another layer of delicious flavor. Chocolate-dipped cookies are especially fitting if you’re using chocolate-themed decorations or a chocolate cake.
3. Incorporating Surprise Fillings
One fun way to elevate your Cookie Monster cake is by adding a surprise inside, like a delicious filling or hidden layers of different textures. This will surprise and delight your guests when they cut into the cake, making it even more memorable.
- Cookie Crumb Layers: Instead of a traditional cake filling, consider adding crushed cookies (like Oreos or chocolate chip cookies) in between the layers. You can fold the crumbs into your buttercream or layer them directly in the middle of the cake to create a delightful crunch. It mimics the idea of Cookie Monster enjoying his favorite treats while also making the inside of the cake just as exciting as the outside.
- Cookie Dough Filling: If you want to go all out with the Cookie Monster theme, you can incorporate edible cookie dough as a filling. Make sure the dough is safe to eat raw (using heat-treated flour and pasteurized eggs), and layer it between the cake layers. This will create a fun surprise as guests take their first bite and encounter chewy bits of cookie dough inside.
- Ice Cream Layer: For a cool, refreshing twist, you can add a layer of ice cream in the middle of your cake. This works especially well in warm weather and makes for a fun, unexpected treat. You could use a vanilla or cookies-and-cream ice cream flavor to complement the cake and cookies, or get creative with different flavors like mint chocolate chip or chocolate fudge.
- Caramel Filling: If you’re looking to add richness and depth, a caramel filling will introduce a smooth, sweet element that contrasts beautifully with the crisp cookie decorations. You can either use store-bought caramel or make your own by cooking sugar and butter together. Spread the caramel between layers or drizzle it on top for a gooey effect.
4. Adding Cookie Monster’s Friends
Want to make your Cookie Monster cake even more fun? Bring in some of his friends from Sesame Street for an extra layer of creativity. These variations will make your cake the star of the party, whether you’re designing a Cookie Monster-themed event or simply want to have a bit more fun.
- Add Elmo’s Face: Alongside Cookie Monster, consider adding Elmo’s face to the cake. Elmo’s red and yellow colors provide a great contrast to Cookie Monster’s blue, creating a vibrant, playful look. You can use fondant to create Elmo’s features, or pipe his face onto the cake using colored buttercream.
- Big Bird’s Touch: You can also decorate with Big Bird’s yellow feathers. This will add a bright, cheerful contrast to the blue fur of Cookie Monster, making the cake look even more colorful. Use yellow buttercream with a star tip for a feathery texture, or cut out feathers from yellow fondant and attach them to the sides of the cake for a more detailed look.
- Oscar the Grouch’s Trash Can: If you want to incorporate a little more whimsy, you could even add Oscar the Grouch’s trash can next to the cake or as part of the cake’s decoration. This can be a fun way to include more characters from the Sesame Street family, and it’s a great conversation starter at the party!
- Count von Count’s Purple Elements: If you want to get really creative, add Count von Count’s signature purple hues to the cake. You can use purple fondant, frosting, or edible decorations to create a fun mix of characters from Sesame Street. The purple will complement the blue and bring an extra layer of vibrancy to the cake.
5. Alternative Cake Shapes and Designs
While a round cake is classic, you can also experiment with different shapes and designs to add uniqueness to your Cookie Monster cake.
- Cookie Monster Cake Pops: If you’re looking for a fun, bite-sized alternative, consider turning the Cookie Monster cake into cake pops! Shape the cake balls into a round shape and decorate them with blue icing and cookie accents. You can even make Cookie Monster’s face on each individual cake pop for a whimsical, party-friendly treat.
- Cookie Monster Cupcakes: Rather than making one large cake, consider baking cupcakes that each have their own little Cookie Monster face. This allows you to serve multiple guests easily, and everyone can enjoy their own personal version of Cookie Monster. You can pipe the blue fur and use mini cookies for the eyes and mouth.
- Shaped Cake Designs: If you’re feeling ambitious, you can carve the cake into the shape of Cookie Monster’s face! Start by baking a large rectangular cake, then use a sharp knife to cut it into the shape of Cookie Monster’s face. You can then decorate it just like the classic design, with blue buttercream, Oreo eyes, and cookies around the mouth.
How to Make a Cookie Monster Cake Using Fondant

Introduction to Fondant
Fondant is a versatile and smooth icing that is a popular choice for cake decorators due to its ability to be shaped, molded, and smoothed over a cake to create a flawless, polished finish. Whether you’re a beginner or an experienced cake decorator, fondant can help you achieve professional-level designs with precision. It’s especially useful for cakes like Cookie Monster cakes, where fine details, such as the character’s eyes, mouth, and fur texture, are essential.
In this section, we’ll dive into the basics of fondant, including what it is, how to work with it, and how it can be used to elevate your Cookie Monster cake. Fondant allows you to create clean, smooth surfaces for your cake and detailed decorations that look realistic and refined.
1. What is Fondant?
Fondant is a soft, pliable sugar dough used to cover cakes and create edible decorations. It’s made primarily of sugar, corn syrup, water, and sometimes gelatin, which gives it a smooth, elastic texture. The consistency of fondant is thick enough to hold its shape but soft enough to roll out and mold into intricate designs. It is typically available in white or colored varieties, and it can also be flavored to add an extra layer of taste to your cake.
Fondant is popular in professional cake decorating because it creates a smooth, seamless surface that can be molded into a variety of shapes. It’s also perfect for covering cakes because it keeps the cake moist underneath while providing a sleek, polished finish. Fondant can be shaped into anything from delicate flowers to bold character faces like Cookie Monster’s eyes and mouth.
2. Why Use Fondant for a Cookie Monster Cake?
Fondant is the ideal material for creating a Cookie Monster cake for several reasons:
- Smooth Surface: Fondant gives your cake a smooth, flawless finish that’s difficult to achieve with buttercream. This is particularly helpful when making detailed decorations, like Cookie Monster’s facial features, where a clean look is essential. The smooth surface also helps fondant decorations like eyes, mouths, and cookie shapes adhere well to the cake.
- Shaping and Molding: Fondant is easy to work with and can be molded into any shape you need. Whether you’re creating Cookie Monster’s googly eyes, a wide smile, or cookie decorations, fondant allows you to craft precise and realistic details. You can roll it out to a thin sheet and drape it over your cake or use it to cut out small shapes for the cake’s decorations.
- Coloring Options: Fondant can be easily colored with gel food coloring, allowing you to create vibrant, bold hues. For a Cookie Monster cake, fondant is perfect for crafting the character’s large, white eyes and for adding details like his blue fur, bright smile, or cookies. You can also mix multiple colors together to create different shades or effects.
- Edible Decorations: Unlike plastic decorations, fondant is completely edible, meaning that all of your creations on the cake—whether it’s Cookie Monster’s face or little cookie embellishments—are delicious to eat. This ensures that not only will your cake look amazing, but it will also taste fantastic!
3. Types of Fondant
There are two main types of fondant that you can use for your Cookie Monster cake: ready-to-roll fondant and homemade fondant. Each has its benefits, depending on your preference, skill level, and available time.
- Ready-to-Roll Fondant: This is the most commonly used type of fondant in cake decorating. It comes in pre-colored blocks or white, which can be easily colored using gel food coloring. Ready-to-roll fondant is widely available in craft stores, baking shops, and online. It is ideal for beginners because it’s easy to handle, and it’s ready to use right out of the package. Simply knead it until it’s soft and smooth, roll it out, and then cover your cake. Brands like Wilton, Satin Ice, and Duff Goldman’s line are popular choices for ready-to-roll fondant.
- Homemade Fondant: For a more hands-on approach, you can make your own fondant at home using ingredients like marshmallows, powdered sugar, and water. Homemade fondant can be more cost-effective and customizable since you control the consistency and flavor. However, it can take a bit of practice to get the right texture. It’s a great option if you’re comfortable working with fondant or if you want to experiment with different flavors and textures.
- Flavored Fondant: If you want to add more depth to the taste of your cake, consider using flavored fondant. While traditional fondant has a sweet, neutral flavor, some brands offer flavored versions that taste like chocolate, vanilla, or even fruit. Adding flavored fondant can make the cake more enjoyable, especially if you want to incorporate different taste profiles that match the cookies or cake flavor you’ve chosen.
4. How to Work with Fondant
Working with fondant might seem intimidating at first, but it’s actually fairly simple once you get the hang of it. Below are some basic tips for handling and applying fondant to your Cookie Monster cake.
- Kneading Fondant: Before using fondant, you need to knead it with your hands to soften it and make it more pliable. If the fondant feels too sticky, dust your work surface and your hands with cornstarch or powdered sugar. If it’s too dry or stiff, add a small amount of vegetable shortening to soften it. Kneading is an important step because it ensures that your fondant will roll out evenly without cracks or tears.
- Rolling Fondant: To cover your cake, roll out the fondant into a thin, even layer using a rolling pin. Aim for a thickness of about 1/8 inch (3 mm). Roll the fondant on a surface dusted with cornstarch or powdered sugar to prevent it from sticking. Once you have the right thickness, carefully drape the fondant over your cake. Smooth it down gently with your hands, working from the top to the sides to eliminate any air bubbles. Use a sharp knife to trim off any excess fondant from the bottom of the cake.
- Smoothing and Shaping Fondant: After applying fondant to your cake, you’ll need to smooth it out using a fondant smoother. This tool helps eliminate wrinkles and air bubbles, giving the fondant a perfectly smooth surface. To create shapes, simply roll out smaller pieces of fondant and cut them into the desired shapes using cookie cutters, fondant molds, or a sharp knife. You can use these shapes to create Cookie Monster’s eyes, mouth, and even cookies for decoration.
- Adhering Fondant Decorations: To attach fondant decorations to your cake, you can use a small amount of water or edible glue (a mixture of water and tylose powder) to act as an adhesive. For larger decorations, like Cookie Monster’s face, it’s often helpful to use a bit of buttercream or royal icing as glue.
- Storing Fondant: Fondant can be stored for later use. If you have leftover fondant, wrap it tightly in plastic wrap and store it in an airtight container. It can last for a few weeks at room temperature. If you’re storing fondant for longer periods, you can refrigerate it to maintain its freshness. Just be sure to let it come to room temperature before using it again.
5. Tips for Using Fondant on Your Cookie Monster Cake
- Avoiding Cracks: Fondant can crack if it’s rolled too thin or if it dries out too quickly. To avoid cracks, make sure you roll the fondant thick enough to cover your cake and handle it gently. If you see cracks, you can often fix them by smoothing the area with your fingers or by applying a little water to the affected area to soften it.
- Add Details with Fondant Tools: Fondant tools, like small modeling tools, embossing rollers, or cutters, can help you add fine details to your decorations. Use these tools to create textures, facial features, or intricate cookie designs for your Cookie Monster cake.
- Working in Stages: If you’re new to fondant, it’s often easier to work in stages. Start by covering the cake with a base layer of fondant, then let it dry slightly before adding the facial features and cookie decorations. This approach gives you more control over the look of your cake and prevents the fondant from becoming too soft or sticky during decorating.
- Keep It Fun: One of the best things about using fondant is its versatility. Don’t be afraid to experiment with shapes, colors, and designs. Whether you’re creating Cookie Monster’s big, bulging eyes or fun cookie accents, fondant gives you the flexibility to bring your imagination to life.
Step-by-Step Tutorial
Creating a Cookie Monster cake from scratch can be a fun and rewarding experience, especially when you see the adorable end result. Whether you’re a beginner or have some cake decorating experience, this step-by-step tutorial will guide you through the entire process—from baking the cake to decorating it with Cookie Monster’s iconic features. Let’s break it down into manageable steps so you can craft your perfect Cookie Monster cake with ease.
1. Gather Your Ingredients and Tools
Before diving into the baking and decorating process, it’s important to gather all the ingredients and tools you’ll need. Here’s what you’ll require:
Ingredients:
- For the Cake: Your favorite cake recipe or box mix (vanilla, chocolate, or a flavor of your choice)
- For the Buttercream Frosting: Butter, powdered sugar, vanilla extract, heavy cream (or milk), blue food coloring, and a pinch of salt
- For Fondant Decorations: White fondant (for eyes), blue fondant (for Cookie Monster’s fur), black fondant (for pupils), and brown fondant or chocolate (for cookies)
- For the Cookie Decoration: Oreo cookies (or any cookies you prefer)
Tools:
- Round cake pans (8-inch or 9-inch)
- Stand mixer or hand mixer (for frosting)
- Spatula and offset spatula (for frosting)
- Rolling pin (for rolling out fondant)
- Fondant tools (for cutting and shaping)
- Cake board or serving plate
- Piping bags and tips (for details and icing)
Once you have everything ready, you can begin the process!
2. Bake the Cake
Start by preparing your cake layers. You can either use your favorite homemade cake recipe or a store-bought cake mix for convenience.
- Preheat your oven to the temperature specified on your cake recipe or box mix instructions.
- Prepare the cake pans by greasing them with butter or oil and lightly dusting them with flour, or using parchment paper for easy removal.
- Mix your cake batter according to the recipe and divide it evenly between the prepared pans.
- Bake the cake layers for the time specified in the recipe, typically around 25-30 minutes. Insert a toothpick into the center to check for doneness—if it comes out clean, the cakes are ready.
- Let the cakes cool in the pans for about 10 minutes, then transfer them to a wire rack to cool completely. It’s essential to cool the cakes fully before frosting and decorating.
3. Prepare the Buttercream Frosting
While the cakes are cooling, prepare the buttercream frosting. This will act as the base for the blue fur that covers Cookie Monster’s face.
- Beat the butter until it’s smooth and creamy (about 2-3 minutes).
- Gradually add the powdered sugar, 1 cup at a time, and mix on low to avoid a sugar cloud.
- Add vanilla extract and a pinch of salt for flavor.
- Add heavy cream a tablespoon at a time until the frosting reaches a smooth and spreadable consistency.
- Color the frosting with blue food coloring. Start with a small amount and mix until you get the desired shade of Cookie Monster blue. You may need to add more food coloring for a richer hue.
Tip: To achieve the fur-like texture, you can opt for a thicker buttercream consistency to hold up better during piping.
4. Assemble the Cake Layers
Now that your cakes are cool and your frosting is ready, it’s time to assemble the cake.
- Trim the cake layers if necessary. If your cakes have domed on top, use a serrated knife to level them out. This will ensure that the cake sits evenly and stacks properly.
- Place the first cake layer on a cake board or serving plate. Add a thin layer of frosting on top to act as the “glue” for the next layer.
- Stack the second cake layer on top of the first, gently pressing down to make sure they stick.
- If you want a more stable structure, you can use cake dowels or straws for support in the center of the cake before stacking the layers.
5. Crumb Coat the Cake
Before applying the final layer of frosting, it’s a good idea to crumb coat the cake. This is a thin layer of frosting that seals in any crumbs, making it easier to apply the final smooth layer of frosting.
- Spread a thin layer of buttercream over the entire cake using an offset spatula. Don’t worry about making it perfect; this is just a base layer to catch any crumbs.
- Once the crumb coat is applied, chill the cake in the fridge for about 20 minutes. This will set the crumb coat and make it easier to apply the final coat of frosting.
6. Frost the Cake with Blue Buttercream
Once your crumb coat has set, it’s time for the final layer of frosting.
- Apply a generous amount of the blue buttercream to the top of the cake. Use your spatula to smooth it out over the sides and top.
- Create texture by using a piping bag fitted with a star tip or a textured spatula to give the frosting a fluffy, fur-like appearance. Work your way around the cake to cover it completely in blue buttercream.
Tip: If you want the fur to be more pronounced, you can add extra layers of buttercream and pipe more stars in some areas to create a thicker, more textured look.
7. Roll and Cut the Fondant for Decorations
Now comes the fun part—creating the character’s features with fondant!
- Prepare the fondant: Roll out your white fondant to about 1/8 inch thick. This will be used to create the eyes. Use a round cookie cutter or a glass to cut two large circles for the eyes.
- Create the pupils: Roll out a small amount of black fondant and cut two smaller circles to place in the center of each white eye. Use a tiny ball of white fondant to create the shine in Cookie Monster’s eyes.
- Make Cookie Monster’s mouth: Roll out a piece of black fondant and shape it into a wide mouth. You can cut it to fit around the bottom of the cake and position it to resemble Cookie Monster’s mouth.
- Make the cookies: Roll out small pieces of brown fondant or use actual cookies (like Oreos) to create Cookie Monster’s favorite snack. You can place one or two cookies near his mouth for added detail.
8. Assemble Cookie Monster’s Face
Once the fondant pieces are ready, it’s time to assemble Cookie Monster’s iconic face on your cake!
- Place the eyes: Position the white fondant eyes on top of the cake, slightly apart, so that it looks like Cookie Monster’s wide-eyed expression. Attach them with a little bit of water or edible glue.
- Position the pupils: Gently place the black fondant pupils into the center of the white eye circles. Make sure they are slightly tilted for that googly-eyed effect.
- Attach the mouth: Position the black fondant mouth below the eyes. If necessary, trim the edges to fit the shape of the cake. Attach it using a bit of water or edible glue.
- Add cookies: For an extra touch, place a couple of cookies near Cookie Monster’s mouth. You can either use fondant cookies or real cookies like Oreos.
9. Final Touches
- Add some extra detailing: If you want to make your Cookie Monster even more expressive, you can pipe small details around the eyes or mouth using white or black buttercream. You can also add texture or extra decorations around the sides of the cake for a more dynamic look.
- Chill the cake: Once everything is assembled, place your completed cake in the fridge for 30 minutes to allow the fondant to set and the frosting to firm up.
10. Serve and Enjoy!
Your Cookie Monster cake is now ready to be enjoyed! Carefully cut the cake into slices and serve to your guests. Be sure to watch their reactions when they see Cookie Monster’s eyes peeking out at them from the top of the cake!
Decorating the Face
Decorating the face of your Cookie Monster cake is the key to bringing the character to life! This step is all about capturing his expressive, googly-eyed look, wide mouth, and lovable personality. With the right techniques and materials, you can make your cake look just like the classic Sesame Street character. In this section, we’ll walk through the process of creating Cookie Monster’s face using fondant, frosting, and a little creativity.
1. Creating Cookie Monster’s Eyes
Cookie Monster’s eyes are one of his most distinctive features, so it’s important to get them right! Here’s how to make large, expressive eyes using fondant.
- Roll the White Fondant: Start by rolling out white fondant to about 1/8 inch thickness. Using a round cutter or the rim of a glass, cut out two large circles for the eyes. Make sure both eyes are the same size for a balanced look.
- Shape the Pupils: Roll out small balls of black fondant, then flatten them slightly to create the pupils. These should be smaller than the white eye circles. Place the black pupils in the center of each white circle.
- Add the Eye Shine: To give Cookie Monster’s eyes that cute, shiny look, roll out tiny balls of white fondant and flatten them to create small “shine” marks. Position these little white dots on the pupils to mimic the shine in his eyes. This adds a sense of life and makes the face more expressive.
Tip: For an even more whimsical effect, you can slightly tilt the pupils toward each other. This gives the googly-eyed look that’s signature to Cookie Monster!
- Attach the Eyes: Once you have shaped the eyes and added the pupils and shine, you’ll need to attach them to your cake. To do this, simply brush the back of the fondant eyes with a little water or edible glue. Then, gently press them onto the top portion of your cake where you want Cookie Monster’s face to be.
2. Crafting the Mouth
The wide mouth is another signature element of Cookie Monster’s face. It’s large, curved, and often depicted in an exaggerated open position, as if he’s about to munch on some cookies!
- Roll Out the Black Fondant: Roll a piece of black fondant into a log shape. This will be the foundation for Cookie Monster’s mouth.
- Shape the Mouth: Curve the black fondant into a smile shape that stretches across the lower portion of the cake. You can cut the fondant to match the shape of the cake’s surface or the dimensions of the eyes. The mouth should be wide and slightly curved upwards at the edges, giving him a friendly and playful expression.
- Refining the Shape: Use a small, sharp knife or fondant tool to smooth and refine the edges of the mouth to ensure it fits perfectly below the eyes.
- Attach the Mouth: Like the eyes, apply a little water or edible glue to the back of the fondant mouth and gently press it into place on the cake.
Tip: If you want Cookie Monster’s mouth to appear even more exaggerated (as if he’s about to gobble up a cookie), you can make the mouth a little wider and create a more pronounced curve. This will add to the comical, over-the-top nature of the character.
3. Adding the Cookies
No Cookie Monster cake is complete without some delicious cookies! Whether you decide to use real cookies (like Oreos) or create them from fondant, this will be the final touch to complete the look of the cake.
- Fondant Cookies: To make edible fondant cookies, roll out brown fondant to about 1/8 inch thick. Cut small circles using a round cutter or a cookie cutter. Then, create texture by lightly pressing the edges with a small fondant tool or the back of a fork to mimic the appearance of cookies.
- Decorate with Chocolate Chips: For an extra touch, roll tiny balls of darker brown or black fondant and press them onto the cookie discs to represent chocolate chips. You can also use small pieces of actual chocolate if you prefer.
- Real Cookies: If you want to keep it simple, you can use real cookies like Oreos. The round, black-and-white appearance of Oreos perfectly mimics the look of the cookies Cookie Monster loves. You can break or trim them to fit around the mouth or position them near the eyes, as if Cookie Monster has just finished a snack.
- Placing the Cookies: Place the cookies around the mouth or near the face. You can position a couple of them so they appear to be in Cookie Monster’s hands, or arrange them scattered across the cake for a fun, scattered effect.
Tip: For a more realistic touch, you can make the cookies look like they’re halfway inside Cookie Monster’s mouth, as if he’s in the process of devouring them. To do this, press them slightly into the fondant mouth or angle them so they seem to disappear into the open mouth.
4. Adding Fun Details with Buttercream
Now that you’ve created the major facial features, you can enhance Cookie Monster’s expression and details with buttercream frosting. This will add texture and help bring the character to life.
- Fur Texture: Using the blue buttercream frosting you prepared earlier, fill a piping bag fitted with a star tip (or a similar textured tip). Pipe little stars of frosting around the edges of Cookie Monster’s face to create the effect of fur. This will give the cake a fun, fluffy look that mimics Cookie Monster’s iconic blue fur.
- Refining the Expression: You can also use buttercream to add extra details around the eyes and mouth, emphasizing the shape and contours of Cookie Monster’s face. For example, pipe a few small lines of frosting around the eyes to make them appear more expressive, or use frosting to create little fur tufts along the edges of the mouth.
Tip: For a more realistic “fur” look, try using different shades of blue buttercream. A darker blue around the edges and a lighter blue near the center can create depth and dimension.
5. Final Touches
After assembling the eyes, mouth, and cookies, and piping the fur texture with buttercream, it’s time for some final touches to make your Cookie Monster cake even more dynamic.
- Add Extra Cookies: If you want to go the extra mile, place a few more cookies around the base of the cake or along the top of the cake. You can even stack a few on top of each other to make them appear like they’re tumbling out of Cookie Monster’s hands or mouth.
- Enhance the Shape of the Cake: If you’re using a round cake, the smooth, circular shape is perfect for Cookie Monster’s face. However, you can also use a shaped cake pan (like a half-sphere) to create a more 3D effect. This will allow you to build the face up and give it more depth, especially for the mouth and eyes.
- Add a Personalized Touch: If the cake is for a special occasion, you can personalize the design by adding the recipient’s name in frosting, using small fondant decorations, or incorporating other fun details like birthday candles, party confetti, or edible glitter.
Pro Tips for Smooth Fondant
Fondant is a versatile ingredient that can elevate your cake designs by providing a flawless, smooth finish. However, achieving a perfectly smooth fondant covering can be tricky for beginners, as it’s easy to encounter wrinkles, cracks, or air bubbles. In this section, we’ll cover pro tips and techniques for applying fondant smoothly to your Cookie Monster cake, ensuring a professional and polished look.
1. Choose the Right Fondant
The quality of your fondant plays a big role in achieving a smooth finish. Not all fondants are created equal, and using high-quality fondant can make your job much easier.
- Commercial Fondant: There are several brands of fondant available on the market, and some are known for being particularly easy to work with, such as Satin Ice, Wilton, or FondX. These brands offer smooth, pliable fondant that’s easy to roll out and drape over cakes.
- Homemade Fondant: If you prefer to make your own fondant, there are many recipes available. Homemade fondant can be softer and smoother, but you’ll need to ensure it’s the right consistency for rolling and smoothing over your cake.
Tip: If your fondant feels too stiff or hard to roll, knead in a small amount of shortening or a little bit of warm water to soften it. If it’s too soft, dust your work surface and rolling pin with powdered sugar or cornstarch to prevent sticking.
2. Prepare Your Cake Properly
A smooth fondant finish depends heavily on how well your cake is prepared before the fondant is applied. If the cake has uneven surfaces, your fondant will follow those imperfections, and the result will be bumpy or lumpy.
- Level the Cake: Make sure your cake layers are level before covering with fondant. Use a serrated knife or cake leveler to trim off any domed tops and create a flat, even surface.
- Crumb Coat: Apply a thin layer of buttercream (or ganache) around the entire cake to seal in the crumbs. This step is essential for achieving a smooth fondant layer. The crumb coat also gives the fondant something to grip onto, preventing it from sliding off the cake.
Tip: Chill the cake after applying the crumb coat for about 20-30 minutes. This helps the buttercream or ganache firm up, making it easier to apply the fondant on top.
3. Roll Out Fondant Evenly
One of the most important steps in applying fondant smoothly is rolling it out to the correct thickness and ensuring it’s even across the entire surface.
- Roll on a Clean Surface: Dust your work surface lightly with cornstarch or powdered sugar to prevent the fondant from sticking. You can also use a silicone baking mat for easy rolling and to reduce the amount of powder needed.
- Use a Rolling Pin: Roll your fondant out evenly by using a rolling pin. For best results, use a smooth, non-stick rolling pin or a fondant-specific pin that has guides on the sides to help you roll the fondant to an even thickness.
- Thickness of Fondant: Roll your fondant to about 1/8 inch thickness. This allows it to be pliable and smooth over the cake but still sturdy enough to hold its shape. If your fondant is too thick, it can be difficult to smooth; if it’s too thin, it may tear or be prone to cracking.
Tip: If you’re rolling out large amounts of fondant (for a multi-tiered cake, for example), try rolling it on a piece of parchment paper, which makes it easier to lift and transfer onto the cake.
4. Lift and Drape Fondant Carefully
Once your fondant is rolled out to the desired thickness, it’s time to lift and drape it onto the cake. This step is often where wrinkles or air bubbles can form, so it’s crucial to do this gently and carefully.
- Use a Fondant Lifter or Rolling Pin: To lift the fondant without stretching it, roll the fondant around your rolling pin or use a fondant lifter. This allows you to pick up the fondant without distorting its shape.
- Drape the Fondant: Gently drape the fondant over the top of your cake. Do not pull or stretch the fondant as you lay it down, as this can cause it to become uneven or tear.
Tip: If your fondant gets too large and unwieldy, don’t hesitate to cut off excess using a sharp knife or pizza cutter before smoothing it onto the cake. Leave a little extra at the bottom, which you can trim away once the fondant is applied.
5. Smooth Fondant with a Fondant Smoother
Once the fondant is draped onto the cake, it’s time to smooth it out and eliminate any air bubbles or wrinkles.
- Use a Fondant Smoother: A fondant smoother is an essential tool for achieving a perfectly smooth finish. Start at the top of the cake and gently move the smoother down the sides, working your way from the center to the edges. This helps eliminate wrinkles and creates a seamless look.
- Work from Top to Bottom: Smooth the fondant from the top down to the sides. This technique prevents the fondant from pulling away from the cake as you work. Always work in gentle, even strokes to avoid tearing the fondant.
- Keep the Cake Rotating: If possible, rotate the cake as you smooth the fondant. This allows you to apply even pressure and ensure that every section of the cake gets the same level of attention.
Tip: For stubborn air bubbles or uneven spots, use a pin or needle to carefully poke a small hole in the fondant. Then, gently smooth the area to release the air and smooth the surface.
6. Trim Excess Fondant
After you’ve smoothed the fondant over the cake, there will likely be excess hanging over the edges. It’s time to trim it to fit the cake neatly.
- Trim Close to the Cake: Use a sharp knife or pizza cutter to carefully trim away the excess fondant at the base of the cake. Aim to trim just below the edge of the cake board to create a clean, finished look.
- Optional: Create a Decorative Edge: If you want a more decorative edge, you can use fondant tools to create a scalloped or ruffled pattern along the base of the cake.
Tip: After trimming, smooth the edge of the fondant with your hands or a fondant smoother to ensure there are no rough spots or bumps.
7. Use Cornstarch or Shortening to Polish
To get a glossy, smooth finish, you can lightly polish the fondant once it’s applied to the cake.
- Polish with Shortening: Take a small amount of shortening on your fingers and gently rub it over the surface of the fondant. This will add a beautiful sheen to your cake and help smooth out any imperfections. Be careful not to use too much, as it can cause the fondant to become too greasy.
- Polish with Cornstarch: Alternatively, you can dust a little cornstarch onto a clean cloth or your hands and gently buff the fondant to give it a smooth, matte finish.
8. Allow Fondant to Set
Once the fondant is applied and smoothed, allow it to set for a few hours or overnight before adding any decorations. This will give the fondant time to firm up and hold its shape.
- Let the Fondant Firm Up: After smoothing, place the cake in a cool, dry place. Avoid refrigerating the fondant-covered cake, as this can cause condensation and make the fondant sticky.
- Let Decorations Set: If you are adding decorations, like Cookie Monster’s face, let the fondant have time to firm up before applying any further details. This ensures that the decorations adhere properly and stay in place.
Summary of Pro Tips for Smooth Fondant:
- Choose High-Quality Fondant: Use commercial fondant like Satin Ice or homemade fondant for a smoother, more pliable texture.
- Prepare the Cake Properly: Level the cake layers and apply a crumb coat to ensure a smooth surface for the fondant.
- Roll Fondant Evenly: Use a smooth surface and a rolling pin to roll fondant to an even thickness, about 1/8 inch.
- Drape Fondant Carefully: Use a fondant lifter or rolling pin to lift the fondant and drape it gently over the cake.
- Smooth the Fondant: Use a fondant smoother to eliminate wrinkles and create a seamless finish.
- Trim Excess Fondant: Trim away excess fondant and smooth the edges for a neat appearance.
- Polish the Fondant: Use shortening or cornstarch to buff the fondant to a glossy or matte finish.
- Allow Fondant to Set: Let the fondant firm up before adding decorations to ensure they stick and maintain their shape.
Easy Cookie Monster Cupcake Tutorial for Smaller Parties

Miniature Version
If you love the idea of a Cookie Monster cake but need something smaller or more individualized, creating a miniature version is the perfect solution. These smaller versions of the classic cake can be just as fun, adorable, and delicious, offering a cute and personalized twist on the larger design. Whether you’re making a mini version for a small party, as a fun dessert for kids, or as individual treats, here are some creative ideas and step-by-step tips for crafting a mini Cookie Monster cake.
1. Mini Cake Pans or Cupcakes
The first step in creating a miniature Cookie Monster cake is to decide on the shape and size. You have several options, including mini cake pans or cupcakes.
- Mini Cake Pans: Miniature round cake pans (4-inch or 6-inch) are perfect for creating a smaller version of the traditional Cookie Monster cake. These pans will allow you to create a smaller, individual-sized cake that maintains the same fun features as the larger version.
- Cupcakes: Cupcakes offer another great option. They can be transformed into mini Cookie Monster faces, with each cupcake acting as an individual serving. This is especially great for parties or when you want to make each guest feel special with their own little Cookie Monster treat.
Tip: If you opt for cupcakes, bake them in standard cupcake liners, then level the tops slightly before decorating to ensure they have a smooth surface for the fondant or buttercream.
2. Scaling Down the Ingredients
Once you’ve decided on your mini cake shape, you’ll need to scale down the ingredients for a smaller batch. Depending on the size of your mini cakes, you’ll likely need less batter, frosting, and fondant.
- Batter: If you’re using mini cake pans, one batch of cake batter (for a standard 8-inch or 9-inch cake) should yield enough for 2-3 mini cakes, depending on the size of the pans. For cupcakes, use a standard cupcake recipe, which will yield around 12 mini cupcakes.
- Frosting: For the frosting, reduce the quantity based on the number of mini cakes or cupcakes. Typically, you’ll need less buttercream than for a full-size cake, so make enough to cover the surface and pipe the details.
- Fondant: Since you’re working with a smaller cake, you’ll need less fondant. A small amount should be enough to cover the top and sides of a mini cake or several cupcakes. Remember to adjust the thickness so it’s not too thick, which can make the fondant less pliable on smaller surfaces.
Tip: Use a scale to measure your ingredients so you don’t make too much extra. This will save time and reduce waste.
3. Adjusting the Proportions of Facial Features
A major consideration when making a miniature version of the Cookie Monster cake is adjusting the proportions of the facial features. Since you’re working with a smaller surface area, the eyes, mouth, and cookies need to be appropriately sized so they still maintain a cute and recognizable look.
- Eyes: For mini cakes, you’ll want to use smaller pieces of fondant for the eyes. Instead of large, round circles, cut smaller circles from fondant (using a 1-inch or 1.5-inch round cutter) to create the eyes. Similarly, use smaller fondant balls for the pupils and the shine spots.
- Mouth: The mouth should be slightly smaller as well, but still wide and exaggerated for that playful look. Use a small piece of black fondant to create a curved, smile-like shape that will sit below the eyes. The smaller version should still have that iconic wide grin.
- Cookies: When it comes to the cookies, use mini versions like miniature chocolate chip cookies, or create small fondant cookies that are about 1-1.5 inches in diameter. You can even use real cookies, such as mini Oreos, which will look just like the ones Cookie Monster loves!
Tip: Miniature versions of facial features work best if you scale them down, but retain the same basic shapes. If the eyes are too large for the mini cake, they may overpower the design.
4. Decorating the Mini Cake
Once your mini cake or cupcakes are baked and cooled, it’s time to start decorating. Here’s how to transform your smaller treats into delightful Cookie Monster faces:
- Fondant Covering: If you’re using fondant, roll it out to a thinner, more manageable thickness, and carefully drape it over the mini cake or cupcakes. Use a fondant smoother to ensure there are no creases or bubbles, just like you would with a larger cake.
- Buttercream Fur: For a more textured look, you can pipe small “fur” details onto the mini cakes using blue buttercream frosting. Use a star tip to create little “fur” shapes around the edges of the cake, giving it the same fluffy appearance as Cookie Monster’s blue fur.
- Facial Details: Position the fondant eyes and mouth on the mini cakes, following the same steps as for the larger cake. Be careful to make sure the proportions are right, and keep the face centered on the mini cake. For cupcakes, the face can be created directly on the top of the cupcake’s surface.
- Decorate with Mini Cookies: Place mini chocolate chip cookies or small fondant cookies around the mouth or even positioned as if Cookie Monster is about to eat them. These can be placed on top of the mini cake or around the edges of cupcakes.
Tip: If using mini cupcakes, it might be easier to use buttercream for the face details instead of fondant. Buttercream is easier to pipe onto smaller surfaces and can still achieve a great Cookie Monster look.
5. Fun Presentation Ideas
Once your mini Cookie Monster cakes are decorated, you can enhance the presentation to make them stand out even more at a party or event.
- Mini Cake Stands: Display mini cakes on small cake stands or cupcake towers. This adds height and drama to the presentation and ensures your mini cakes don’t get lost among other treats.
- Cupcake Boxes: For individual servings, place mini cupcakes in cupcake boxes or clear cellophane bags tied with a ribbon. This creates a cute gift presentation and makes them easy to hand out to guests.
- Serving Platters: Arrange the mini cakes or cupcakes in a fun pattern on a large platter or cake board. You can place several mini cakes together, or position cupcakes in a way that makes them look like Cookie Monster is “sharing” his cookies with everyone.
Tip: If you’re serving at a kid’s party or themed event, place a fun sign next to the treats that says “Cookie Monster’s Cookies” for a playful touch.
6. Personalized Mini Versions for Special Occasions
Miniature Cookie Monster cakes are not only adorable but can also be customized for special occasions. Here are a few ideas for adding a personal touch to your mini cakes:
- Mini Birthday Cakes: Personalize mini cakes for birthday parties by adding the recipient’s name or age using buttercream or fondant letters. You can also add a little birthday candle on top of each mini cake for a festive touch.
- Mini Party Favors: If you’re hosting a Cookie Monster-themed party, mini cupcakes or cakes can be given away as party favors. They can be wrapped in clear plastic and tied with ribbons, making them the perfect take-home gift.
- Seasonal Themes: You can adapt the mini Cookie Monster cakes for different seasons or holidays by adding themed decorations, like tiny fondant pumpkins for Halloween or hearts for Valentine’s Day. Customizing your mini cakes adds another level of fun!
Decorating Tips
Decorating a Cookie Monster cake is one of the most fun aspects of creating this themed cake, and it’s also one of the most important. The details you add will bring the cake to life, transforming a simple cake into a playful, whimsical creation. Whether you’re using fondant, buttercream, or a combination of both, here are some expert decorating tips that will help you achieve a cake that looks not only adorable but also polished and professional.
1. Use a Smooth Base Layer
The foundation of a beautifully decorated cake starts with a smooth and even base layer. If you’re using fondant, ensure it is smooth and free of wrinkles, as these can make your design look unfinished. If you’re working with buttercream, make sure it’s evenly spread and doesn’t have visible crumb marks.
- Fondant Base: If you’re covering your cake with fondant, roll it out to an even thickness and carefully drape it over the cake. Use a fondant smoother to eliminate any bubbles and wrinkles, especially around the edges. This creates a clean, professional look that provides a perfect base for the Cookie Monster face.
- Buttercream Base: For buttercream, apply a crumb coat first. This thin layer will seal in the crumbs and give you a smoother surface for the final coat. Once the crumb coat is set (chilled for about 30 minutes), apply a thick, even layer of buttercream. Use an offset spatula to smooth the surface. If you want to create a fluffy, fur-like texture, use a star tip to pipe the buttercream in short, firm strokes all over the cake.
2. Create a Bold Cookie Monster Face
The face is the focal point of your Cookie Monster cake, so making it stand out is key to the success of your decoration.
- Fondant Eyes: For Cookie Monster’s signature googly eyes, use white fondant for the eye bases, and black fondant for the pupils. You can also use a little white fondant to make the “shine” on his eyes by rolling small pieces and attaching them to the pupils. For extra detail, you can use edible food markers to draw small black lines on the whites of the eyes to give them more depth and realism.
- Mouth and Smile: Cookie Monster’s large, wide smile can be created from black fondant. Roll it into a thick snake shape and then cut it to form the outline of his mouth. For the upper lip, you can use a thin strip of fondant to create the rounded shape above the smile. Remember, his smile should be wide and exaggerated to convey his enthusiastic, cookie-obsessed personality.
- Cookie Detail: One of the most fun parts of decorating the Cookie Monster cake is adding the cookies! You can use small chocolate chip cookies, or make your own out of fondant. Use a round cutter to create little cookie shapes, and then add small “chips” using black or brown fondant balls. If you’re using real cookies, arrange them around the face as if Cookie Monster is munching on them. Make sure to place a couple inside the mouth for a fun, playful touch.
3. Make Cookie Monster’s Fur Look Fluffy
Cookie Monster’s fluffy, blue fur is an iconic feature of his look, and achieving this texture is key to making the cake feel realistic and fun.
- Buttercream Fur: If you are using buttercream, the best way to replicate Cookie Monster’s fur is by using a piping tip that creates texture. The Wilton 233 (grass tip) or Wilton 21 (closed star tip) are perfect for this. Pipe small, tufts of buttercream all over the cake, layering them to mimic the soft, tousled look of fur. Work from the bottom of the cake upwards, covering the entire cake in layers to create a voluminous effect.
- Fondant Fur Texture: If you prefer to use fondant, you can add texture by lightly scoring the surface with a small tool like a fondant texture mat or a simple fork. Press the tool gently into the fondant to create small, soft grooves that will resemble the texture of fur.
4. Keep Proportions Playful and Exaggerated
Cookie Monster’s charm lies in his exaggerated, playful features. When decorating the cake, make sure to keep the proportions of the face, eyes, and smile larger than life.
- Big Eyes: Cookie Monster’s eyes are large and bulging, and this is a defining feature of his character. Ensure the eyes are disproportionately large in comparison to the rest of the face to capture his whimsical, cartoonish charm.
- Wide Mouth: Similarly, Cookie Monster’s mouth should be wide and expressive, stretching almost from ear to ear. Keep the smile exaggerated to enhance the playful nature of the cake.
5. Add Fun Details with Edible Paint or Markers
To enhance your design and make it pop, you can use edible food paints or markers for extra details on your Cookie Monster cake.
- Food Markers: Use edible food markers to add small details to the eyes, like tiny black dots for pupils or a highlight to create a glossy effect. Food markers can also be used to add “crumbs” around Cookie Monster’s mouth, emphasizing that he’s just devoured some delicious cookies.
- Edible Paint: If you want to add color or shading to specific areas of the cake, consider using edible paints. For instance, you can paint the inside of the mouth with red edible paint to create a vibrant, realistic look. You can also paint a light blue on the edges of the fur to give it some depth and dimension.
6. Consider the Cake’s Structure
When decorating a themed cake like Cookie Monster, it’s important to keep in mind the structure and placement of your decorations to ensure they hold up and maintain their integrity throughout the celebration.
- Stabilize the Cake: If you are using fondant for covering the cake, make sure to chill your cake before adding the fondant, which helps the buttercream or ganache underneath firm up. This provides a sturdy base that will prevent the fondant from shifting during decoration.
- Support Larger Features: If you’re adding large decorations (like Cookie Monster’s large eyes or oversized cookies), consider adding some support to the cake. For example, place skewers or cake dowels inside the cake to stabilize the heavy decorations and keep everything in place.
7. Final Touches and Presentation
Once your cake is decorated, add a few final touches to enhance the overall presentation.
- Add Cookie Crumbs: Sprinkle small chocolate chip cookie crumbs around the base of the cake or on the cake board. This not only ties into the Cookie Monster theme but also adds texture and depth to the cake’s presentation.
- Use Fun Sprinkles or Edible Glitter: Consider adding some fun, colorful sprinkles to the cake to enhance the party vibe. Edible glitter or shimmer dust can also be used to add sparkle to the eyes or around the cake’s edges.
- Cake Topper: For an extra touch, you could place a Cookie Monster figurine or a fun “Happy Birthday” topper on top of the cake. This adds an extra layer of celebration and can make the cake look even more festive.
Themed Party Ideas
A Cookie Monster cake isn’t just about the dessert—it can also serve as the centerpiece for an entire themed party! Whether you’re planning a birthday party for a child, a fun celebration for Cookie Monster fans, or a unique event with a Sesame Street vibe, the possibilities for a Cookie Monster-themed party are endless. Here’s a detailed guide to help you plan a memorable and immersive Cookie Monster party with fun decor, games, activities, and themed party favors.
1. Invitations
Set the tone for the party right from the start with creative invitations that match the Cookie Monster theme.
- Cookie Monster Face Invitations: Design invitations that feature Cookie Monster’s iconic googly eyes and big, smiling mouth. Use blue cardstock for the background and create the eyes and mouth with cut-out shapes of white, black, and blue paper. You can even include a small “cookie” cutout made of brown paper or a real cookie attached to the invitation as a fun bonus.
- Edible Invitations: For a unique twist, send out edible invitations by creating cookies in the shape of Cookie Monster’s face or cookies with the party details written in edible ink. These can be packaged in small clear bags with a cute message like “You’re Invited to Cookie Monster’s Cookie Party!”
- Video Invitations: Send a playful video invitation featuring Cookie Monster (or a person dressed as him) inviting guests to join in on the fun. This adds an extra element of excitement and sets the stage for an interactive event.
2. Decorations
Transform your party space into a Cookie Monster wonderland with these creative decoration ideas.
- Color Scheme: Use blue as your main color, as it’s synonymous with Cookie Monster’s furry appearance. Complement this with touches of white (for the eyes) and brown (for the cookies). You can also incorporate hints of yellow (representing the cookie’s color) and green (for a fun contrast).
- Cookie Monster Balloons: Choose blue balloons in various sizes to create a balloon arch or balloon bouquets. You can even find balloons shaped like Cookie Monster’s face. Place them throughout the party area or as part of the backdrop to make a dramatic statement.
- Cookie Monster Cutouts: Hang up large, printable Cookie Monster cutouts on the walls or above the party tables. You can find templates online to print and cut out yourself, or purchase pre-made cutouts. You can also hang smaller cutouts of cookies and Cookie Monster’s face on a string to create a festive atmosphere.
- Cookie-Themed Tableware: Use Cookie Monster-themed tableware, such as plates, cups, napkins, and tablecloths. Many party supply stores offer Cookie Monster-themed sets that feature his face, eyes, and mouth. You can also make your own plates by using paper plates with Cookie Monster’s face drawn or printed on them.
- Cookie Cookie Centerpieces: For the party table, create cookie-inspired centerpieces using oversized cookies or even a giant Cookie Monster cookie cake. Place them in the center of the table as an edible focal point. Alternatively, you could fill jars with cookies or cookie-shaped items for a fun visual effect.
Find all the Cookie Monster decorations you need at Party City’s Cookie Monster section.
3. Party Games and Activities
To keep guests entertained, incorporate fun games and activities that fit the Cookie Monster theme.
- Cookie Decorating Station: Set up a cookie decorating station where guests can decorate their own cookies. Provide plain sugar cookies, frosting in different colors, chocolate chips, sprinkles, and fondant for guests to create their own Cookie Monster cookies. You can also provide Cookie Monster-shaped cookie cutters to make it even more fun!
- Cookie Toss Game: Play a game where guests toss cookies (real or faux) into a bucket or hoop. For extra fun, you can use foam or soft cookies for safety, especially for younger children. You could even make it a relay race, where teams try to toss as many cookies into the bucket in a set time.
- Cookie Monster’s Cookie Hunt: Set up a cookie scavenger hunt. Hide cookie-shaped tokens or real cookies around the party area and create clues or maps to help guests find them. Whoever finds the most cookies wins a prize, like a Cookie Monster plush toy or a cookie-themed treat.
- Pin the Cookie on Cookie Monster: This is a fun, party-friendly version of “Pin the Tail on the Donkey.” Draw or print a large Cookie Monster poster and cut out a few “cookie” shapes. Blindfold the guests and have them try to pin the cookies onto Cookie Monster’s mouth. The person who gets the cookie closest to the mouth wins!
- Cookie Monster Piñata: Create a piñata in the shape of Cookie Monster or a cookie and fill it with candy, cookies, or small prizes. Guests can take turns trying to break it open while everyone else cheers them on. This adds a great interactive element to the party.
4. Themed Food and Drinks
A Cookie Monster party wouldn’t be complete without delicious treats and snacks that align with the theme.
- Cookie Monster Cake: Naturally, the star of the dessert table should be your show-stopping Cookie Monster cake. Complement it with a few smaller desserts shaped like cookies or cupcakes, all decorated with Cookie Monster’s face. Serve up mini cupcakes or cookies that feature his signature eyes, mouth, and fur.
- Cookie Buffet: Create a cookie buffet with a variety of cookie options—chocolate chip, sugar cookies, oatmeal, and even giant cookie cakes. You can also bake cookies in the shape of Cookie Monster’s face using a cookie cutter, or make large “cookie” cupcakes.
- Milk Station: Cookie Monster loves cookies and milk! Set up a milk station with different flavored milks (like chocolate, strawberry, or regular milk) and colorful straws. You can even add fun signage like “Cookie Monster’s Milk Bar.” For added fun, offer milkshake options or a “cookie dunking” station where guests can dip their cookies into milk.
- “Cookie” Punch: Serve a fun drink in a large punch bowl that can be called “Cookie Monster’s Blue Punch.” You can make a bright blue punch by mixing lemonade with blue fruit punch or a blue sports drink. For an extra touch, add cookie-shaped ice cubes or serve it in clear cups with Cookie Monster face decals.
- Cookie Monster-Themed Cookies: Aside from the main cake, offer cookies decorated with Cookie Monster’s face or with cookie “bites” taken out of them. You can also serve cookies with blue frosting or even sprinkle a little edible glitter to make them pop.
5. Party Favors
Send your guests home with fun and memorable Cookie Monster-themed party favors.
- Cookie Bags: Give each guest a small cookie bag filled with delicious treats, including chocolate chip cookies, mini Cookie Monster cookies, or even cookie-flavored candies. You can seal the bags with blue ribbon or custom Cookie Monster stickers.
- Plush Toys or Figurines: Send each guest home with a Cookie Monster plush toy or figurine. This not only fits the theme perfectly, but it also serves as a fun memento of the party.
- Cookie Monster Goodie Bags: Fill goody bags with Cookie Monster-themed trinkets, such as Cookie Monster-themed pencils, erasers, stickers, or small toys. You could also include cookie cutters in the shape of Cookie Monster’s face, so kids can make their own Cookie Monster-shaped cookies at home.
- Cookie Monster T-Shirts: Give out themed t-shirts featuring Cookie Monster’s face, or create personalized shirts with the party date and theme. These can make for fun souvenirs that everyone will love.
6. Music and Entertainment
Set the mood for the party with some fun music and entertainment options that enhance the Cookie Monster theme.
- Sesame Street Playlist: Play a selection of Sesame Street songs, including “C Is for Cookie” (of course!), “Sunny Day,” and other fun, classic tunes that kids will recognize and love. You can create a playlist ahead of time or use a streaming service that offers Sesame Street songs.
- Live Entertainment: If your budget allows, consider hiring a performer to dress as Cookie Monster for the party. A live Cookie Monster mascot can interact with guests, take photos, and even hand out cookies or gifts. Alternatively, you could have a Cookie Monster character appear virtually, interacting with the children via a video call for a fun surprise.
Pro Tips for Cupcakes
Cupcakes are a perfect addition to any Cookie Monster-themed party, offering a portable and customizable treat that guests can enjoy alongside the larger cake. They’re also a great option for party-goers who want a mini version of the Cookie Monster experience. Whether you’re making them from scratch or using a cake mix, decorating them in the Cookie Monster theme can take them to the next level. Here are some pro tips for baking and decorating cupcakes that will leave a lasting impression.
1. Choose the Right Cupcake Base
While the fun is in the decoration, the base of your cupcake is crucial for both flavor and texture. For a Cookie Monster theme, opt for a cupcake flavor that complements the fun and whimsical nature of the theme.
- Classic Vanilla or Chocolate: These classic flavors are crowd-pleasers and easy to pair with a variety of fillings and toppings. Vanilla provides a neutral base that highlights the Cookie Monster decorations, while chocolate adds richness and works well with the “cookie” theme.
- Cookie-Flavored Cupcakes: To make your cupcakes even more thematic, try baking cookies-and-cream cupcakes by incorporating crushed chocolate chip cookies or Oreo crumbs into the batter. This adds texture and flavor that ties into the overall cookie theme.
- Funfetti Cupcakes: A bright and colorful option, Funfetti cupcakes are playful and visually appealing. The colorful sprinkles inside can enhance the whimsical vibe of a Cookie Monster party.
2. Use the Right Cupcake Liners
The right cupcake liners can instantly elevate the look of your cupcakes. For a Cookie Monster theme, choose liners that will complement the vibrant blue color and playful nature of the design.
- Blue Cupcake Liners: Opt for blue cupcake liners to match Cookie Monster’s signature color. These will create a cohesive look, tying in with the cake and other party decorations. You can find liners with various patterns, like polka dots or stripes, which can add a touch of fun.
- Cookie-Themed Liners: Look for cupcake liners that feature cookie prints or Cookie Monster’s face. These add an extra layer of theme and can be purchased online or at party supply stores.
3. Get Creative with Cookie Monster Faces
The most fun part of decorating Cookie Monster cupcakes is creating his distinctive face. Here are some ways to make sure your Cookie Monster faces look perfect.
- Frosting the Cupcake: Start by frosting each cupcake with blue buttercream or blue-colored whipped cream. The goal is to cover the cupcake entirely with blue, giving the appearance of Cookie Monster’s furry body. Use a piping bag with a star tip or grass tip to create a textured, fur-like effect. This will give your cupcakes the “fluffy” look that mirrors Cookie Monster’s character.
- Fondant or Frosting Eyes: You can either use fondant or frosting to create Cookie Monster’s eyes. For fondant eyes, roll out white fondant into two circles and add black fondant for the pupils. Use a tiny amount of white fondant for the eye highlight to make them appear more lifelike. If you prefer using frosting, pipe large white circles for the eyes, adding black frosting or edible markers for the pupils.
- Big, Googly Eyes: The eyes are the most iconic feature of Cookie Monster. Make sure to make them large and exaggerated. If you’re going for an ultra-cute look, place one eye slightly higher or angled differently from the other to capture his quirky personality.
- Mouth and Cookies: Create Cookie Monster’s mouth by piping black frosting in a wide, half-moon shape onto each cupcake. Then, for added fun, place a small chocolate chip cookie in the cupcake’s mouth as if he’s mid-bite. You can use mini chocolate chip cookies or fondant cookies for this decoration.
4. Add Textured Frosting with the Right Tools
The texture of Cookie Monster’s fur is an essential part of his look. Achieving the right fur-like effect on your cupcakes can be done with the right tools and techniques.
- Use a Grass Tip or Star Tip: For the best texture, use a grass piping tip (like Wilton 233) or a star piping tip (like Wilton 21). The grass tip creates fine, fur-like strands, while the star tip adds more defined “fur” shapes. Pipe small tufts all around the edge of the cupcake to mimic the appearance of fur.
- Smooth Base with a Spatula: If you prefer a smoother look with some texture, spread a base layer of frosting using an offset spatula, and then create small swirls of frosting to simulate fur. This works well if you’re aiming for a smoother, less “wild” appearance while still keeping that playful look.
5. Personalize with Cookie Decorations
One of the best parts of the Cookie Monster theme is the opportunity to get creative with cookie-themed decorations. Here are some pro tips for adding the cookie touch:
- Mini Cookies: Add mini chocolate chip cookies or Oreo cookies to the top of each cupcake to make it look like Cookie Monster just devoured them. You can also place the cookies “half-eaten” inside the mouth for a cute, quirky effect.
- Cookie Crumbs: For an additional detail, sprinkle some cookie crumbs around the edge of the frosting to simulate cookie “crumbs” that Cookie Monster has left behind in his excitement. This can be done with crushed cookies or even graham crackers.
- Cookie Dough Frosting: If you’re really leaning into the cookie theme, try frosting your cupcakes with a cookie dough-flavored buttercream. You can add mini chocolate chips to the frosting to give it an authentic “cookie dough” taste.
6. Add Fun Details with Edible Glitter or Sprinkles
To make your Cookie Monster cupcakes extra fun, consider adding edible glitter or colorful sprinkles to enhance the design. These details can make your cupcakes look more polished, vibrant, and festive.
- Edible Glitter: Dust your cupcakes with a light layer of edible blue glitter to give them an extra sparkle, making them pop in photos and adding a whimsical, magical touch to your presentation.
- Cookie Sprinkles: Use cookie sprinkles (tiny, edible chocolate chip shapes) around the edges of the cupcakes or on top of the frosting for added texture. This gives the cupcakes a more realistic “cookie” feel and reinforces the theme.
7. Consider Cupcake Display Options
Presentation is key when serving cupcakes at a themed party. A well-arranged display not only looks attractive but also adds to the overall party atmosphere.
- Cupcake Stand: Use a multi-tiered cupcake stand to display your cupcakes in an eye-catching way. A stand with a whimsical, playful design can further enhance the Cookie Monster theme. You can even decorate the stand with small Cookie Monster figures, cookie-shaped confetti, or blue fabric.
- Cupcake Wrappers: Use decorative cupcake wrappers that fit the theme. You can find wrappers that are themed to match Cookie Monster, such as those with a blue fur texture, cookie patterns, or Cookie Monster’s face. Wrappers help elevate the presentation while keeping the cupcakes neat.
- Cupcake Boxes for Takeaways: If your guests want to take cupcakes home, use themed cupcake boxes with a Cookie Monster design. These can be a cute and practical party favor that ensures everyone leaves with a sweet treat.
Fun Cookie Monster Cake Pops Tutorial for a Unique Treat
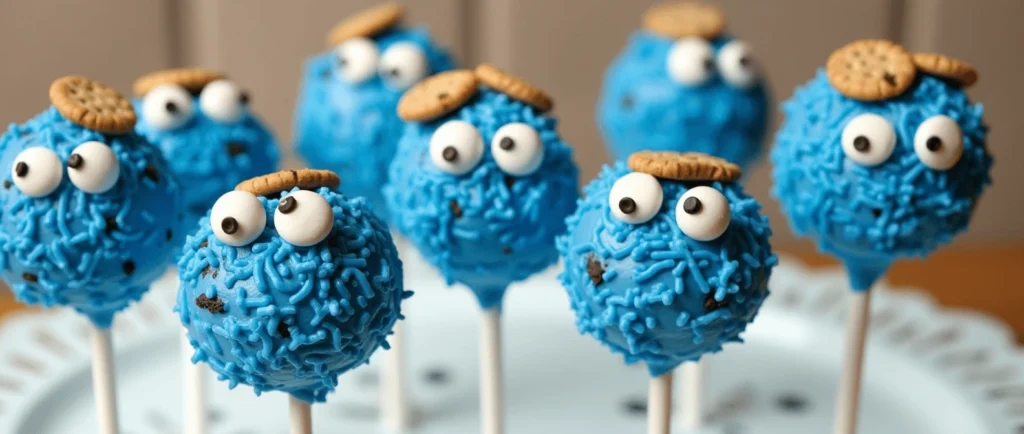
Intro to cake pops
Cake pops are one of the most fun and customizable treats for any occasion, and they make a delightful addition to a Cookie Monster-themed party. These bite-sized cake creations are perfect for guests who want a fun, portable dessert that’s both delicious and visually engaging. Whether you’re making them to complement your main Cookie Monster cake or as an individual treat for guests, cake pops can be decorated to reflect the theme while offering a tasty bite-sized option for party-goers.
What Are Cake Pops?
Cake pops are small, round balls of cake that are dipped in chocolate or candy coating and served on sticks. They’re a delightful cross between cake and lollipops, offering the best of both worlds in a convenient, easy-to-eat form. Typically, cake pops are made by combining crumbled cake with frosting, then rolling the mixture into balls before dipping them into melted chocolate or candy melts. They are then allowed to set on sticks, making them perfect for party displays or dessert tables.
Cake pops are incredibly versatile—they can be flavored in a variety of ways, decorated with themes, and are often seen as a fun way to enjoy cake in smaller, more interactive portions.
Why Cake Pops Are Perfect for a Cookie Monster Party
Cake pops are an ideal choice for a Cookie Monster-themed event for several reasons:
- Portability: Cake pops are easy for guests to grab, eat, and enjoy, making them a great choice for a party with lots of guests or children. They allow everyone to enjoy the flavor and fun without worrying about cutting a slice of cake.
- Customization: Cake pops are highly customizable in terms of both flavor and decoration. You can make them in any color (including Cookie Monster’s iconic blue) and decorate them with Cookie Monster’s signature eyes, cookies, and even edible glitter to match the party theme.
- Interactive: Cake pops can be a fun activity for kids to decorate at the party. You can set up a cake pop decorating station where guests can dip their cake pops in blue icing or candy melts, add candy eyes, and decorate with cookie crumbs or sprinkles. It’s a great way to engage guests in the party fun!
- Easy to Serve: Unlike traditional cake slices, which require plates, forks, and extra cleanup, cake pops are served on sticks, making them easy to serve and eat without any additional utensils or mess.
How to Make Cake Pops: A Basic Overview
Making cake pops is a simple process, though it requires some patience and attention to detail. Here’s a step-by-step guide to get you started:
- Bake the Cake: Start by baking your favorite cake. You can make it from scratch, use a box mix, or even opt for a cookie-flavored cake to match the Cookie Monster theme. Once the cake is baked, let it cool completely.
- Crumble the Cake: Once cooled, crumble the cake into small pieces using your hands or a fork. The crumbled cake should resemble fine crumbs, making it easier to mix with frosting.
- Add Frosting: Gradually add frosting to the crumbled cake. About 1 cup of frosting per 9-inch cake should be sufficient, but adjust according to the consistency you prefer. The goal is to bind the cake crumbs together, but the mixture should not be overly wet or sticky. It should hold its shape when rolled into a ball.
- Form Cake Balls: Roll the mixture into small, uniform balls, about 1 inch in diameter. You can use a cookie scoop for uniformity. Gently press the mixture into a compact ball to ensure it sticks together well.
- Insert Cake Pop Sticks: Melt a little bit of your coating (such as chocolate or candy melts) and dip the end of a lollipop stick into the melted coating. Insert the stick about halfway into each cake ball to help secure the stick and prevent it from falling off later.
- Dip in Coating: Once the cake pops are formed and the sticks are secured, it’s time to dip them into your coating. Melt your chocolate or candy melts and dip each cake pop fully into the coating, ensuring it’s completely covered. You can use blue candy melts or chocolate for a Cookie Monster theme.
- Decorate: After dipping the cake pops, you can start decorating. To make them resemble Cookie Monster’s face, you can add fondant or icing eyes, a black icing mouth, and mini chocolate chip cookies or cookie crumbs on top for extra flair.
- Let Them Set: Place the cake pops in a Styrofoam block or a cake pop stand to allow the coating to set. This will prevent the cake pops from smudging and will ensure they harden properly. Allow them to set for at least 30 minutes.
Pro Tips for Cake Pops
Making perfect cake pops can take some practice, but these tips will help ensure they come out beautifully every time:
- Achieve the Right Consistency: If your cake pops are too crumbly and fall apart, you may need more frosting. If they’re too sticky and soft, add more cake crumbles. The mixture should be moist enough to hold together but firm enough to maintain its shape once dipped.
- Use a Styrofoam Block for Drying: As cake pops are cooling and setting, place them in a Styrofoam block or foam cake pop stand. This will allow the coating to dry without them touching any surfaces and without disturbing their shape.
- Don’t Overcrowd: When dipping your cake pops in the melted coating, be sure not to overcrowd the pot. Overcrowding can cause the coating to become too thick, leading to uneven coating or breaking the stick.
- Let the Cake Pops Cool Before Decorating: Allow the cake pops to cool and the coating to harden before attempting to decorate them. Otherwise, the decorations (like fondant eyes or sprinkles) may melt or slide off.
- Double Dipping for a Smooth Finish: For a smooth, even coating, dip each cake pop twice—first, in a base layer of coating, let it set for a few minutes, and then dip again for a more polished look.
- Customize the Decorations: For a Cookie Monster theme, use blue candy melts or blue frosting for the main body. Then, add white and black icing or fondant to create the eyes, and top with small chocolate chip cookies or cookie crumbs for a fun, themed effect.
- Storing Cake Pops: Cake pops can be made ahead of time and stored in an airtight container at room temperature for up to 1 week. If you need to store them for longer, refrigerate them, but allow them to come to room temperature before serving.
Decorating Cake Pops for a Cookie Monster Party
Cake pops are perfect for a Cookie Monster theme, as they can easily be transformed into mini Cookie Monster faces. Here’s how you can make your cake pops even more adorable:
- Create Cookie Monster Faces: After dipping your cake pops in blue coating, use white fondant or white frosting to make the eyes. You can use a small piece of black fondant for the pupils. Pipe a big, goofy smile with black icing for the mouth.
- Add Mini Cookies: Top each cake pop with a mini cookie or crushed cookie crumbs to enhance the “cookie” theme. This will make your cake pops instantly recognizable as a Cookie Monster-inspired treat.
- Use Colorful Sprinkles: For extra flair, use blue, white, and brown sprinkles or edible glitter to decorate your cake pops. This will give them an added visual pop, especially when displayed at your party.
- Use Cookie Pop Stands: To make your cake pops look even more professional, display them in a cake pop stand or arrange them on a decorative tray. This makes it easier for guests to grab them and adds a festive touch to your dessert table.
Making Cookie Monster Cake Pops
Cookie Monster cake pops are a playful, bite-sized treat that perfectly complement the larger Cookie Monster cake. These mini cakes on a stick are not only fun to eat but also serve as an adorable and interactive addition to any Cookie Monster-themed party. Whether you’re making them for kids or adults, these cake pops are guaranteed to steal the show at your party! Let’s walk through the process of making Cookie Monster cake pops, from baking to decoration, to help you create the perfect treat.
1. Bake the Cake for Your Cake Pops
The first step in making Cookie Monster cake pops is to bake the cake. This is the base of the cake pops, so you want to choose a flavor that complements the Cookie Monster theme. You can use a classic vanilla, chocolate, or even a cookies-and-cream flavor to match the “cookie” theme.
- Flavor Options: Choose a flavor like vanilla or chocolate to keep it simple, or make things more thematic with a cookies-and-cream cake. You can add crushed Oreos into the batter for extra flavor and texture.
- Use a Box Mix or Homemade Recipe: If you’re pressed for time, you can easily use a box mix to save on preparation time. However, if you want to make the cake from scratch, it can give you more control over the flavor.
Once the cake is baked, allow it to cool completely before proceeding to the next step. Cooling the cake is important, as it prevents the cake from being too crumbly when you break it apart for the cake pop mixture.
2. Crumble the Cake
Once your cake has cooled, it’s time to crumble it. This step is key for creating the base for your cake pops.
- How to Crumble the Cake: Use your hands or a fork to crumble the cake into fine, even crumbs. The goal is to break the cake into small pieces, resembling a coarse crumb texture.
- Avoid Large Chunks: Make sure to remove any large chunks, as they won’t bind well with the frosting and will make your cake pops fall apart.
You should have about 3-4 cups of crumbled cake from one cake. If you find that you’ve made too much, you can always save the extra for another batch of cake pops or use it for other desserts like cake truffles.
3. Add Frosting to Bind the Cake
Now that you have your crumbled cake, it’s time to add frosting to bind everything together and give the cake pops their moist, cohesive texture.
- Amount of Frosting: For each 9-inch cake, you’ll typically need about ½ to 1 cup of frosting. Start with a small amount and gradually add more until the cake crumbs hold together when rolled into a ball.
- Frosting Choices: Traditional buttercream frosting works well for cake pops because it’s smooth and sticky. You can also use cream cheese frosting for a tangier flavor. If you’re aiming for a more subtle flavor, you can stick to a simple vanilla frosting.
Once the frosting is added, mix it thoroughly into the cake crumbs until the mixture is moist but not too wet. The texture should be pliable enough to roll into balls, without being too sticky.
4. Shape the Cake Pops
This is the fun part where you roll the cake mixture into small balls that will eventually become your Cookie Monster cake pops.
- Size of Cake Pops: Aim for uniform balls, typically about 1 inch in diameter, so they fit well on the sticks. Use a cookie scoop to ensure the cake pops are the same size, making the process easier and faster.
- Firm the Cake Balls: Gently press the mixture into compact balls so that they hold together well. If the balls are too loose, they might fall apart during the dipping process.
After shaping the cake pops, place them on a parchment-lined tray to prepare for the next steps.
5. Insert the Cake Pop Sticks
To ensure your cake pops stay intact while dipping, you need to insert sticks into them.
- Coat the Stick First: Before inserting the stick into the cake pop, dip the end of the cake pop stick into melted candy melts or chocolate. This will help anchor the stick in place and prevent it from falling out later.
- Insert the Stick: Carefully insert the coated end of the stick into the center of each cake ball, about halfway through. Be gentle to avoid cracking the cake ball.
Place the cake pops back onto the tray and refrigerate them for about 20-30 minutes to firm up the sticks and the cake balls. This helps prevent them from falling apart during the coating process.
6. Dip the Cake Pops in Coating
Once the cake pops are firm, it’s time to dip them in a colorful coating. For a Cookie Monster theme, blue is the star color, but you can also use white for eyes or black for the pupils.
- Melting the Coating: Use candy melts, chocolate, or even fondant as a coating. Melt your candy melts or chocolate according to the package instructions, making sure it’s smooth and not too thick for dipping. If it’s too thick, it can cause the coating to crack once it hardens.
- Dipping the Cake Pops: Dip each cake pop into the melted coating, holding it by the stick. Swirl it gently to coat the entire cake pop, ensuring it’s evenly covered. Let any excess coating drip off. If you want a thicker layer of coating, dip the cake pops twice, allowing the first layer to dry before repeating the dip.
- Set the Cake Pops to Dry: Once dipped, place the cake pops back on the tray or a cake pop stand to dry. To prevent them from smudging, let them set in a cool area for at least 30 minutes.
7. Decorating the Cake Pops: Cookie Monster Face
Now comes the fun part—decorating your cake pops to look like Cookie Monster! With a little creativity and the right ingredients, you can make these cake pops look like mini Cookie Monster faces.
- Create Cookie Monster’s Eyes: Use large, round white candy melts or white fondant to form the eyes. You can also use small round candies like white chocolate chips or mini marshmallows for the eyes.
- Use black candy melts or black edible markers to create the pupils. Place the pupils off-center for a quirky look, as Cookie Monster’s eyes are known for being exaggerated and sometimes asymmetrical.
- Add Cookie Monster’s Mouth: Use black royal icing or black fondant to create a wide, smiling mouth. You can pipe the icing onto the cake pop or carefully place a strip of fondant in the shape of a mouth.
- For a more realistic look, make the mouth look as if Cookie Monster is eating a cookie by making the edges jagged or adding “cookie crumbs” around the mouth.
- Add Cookies: Mini chocolate chip cookies or crushed cookies (such as Oreos) are the perfect addition to Cookie Monster cake pops. You can place a mini cookie on the mouth or top of the cake pop to make it look like Cookie Monster is munching on his favorite snack. Alternatively, crush some cookies and roll the cake pop in cookie crumbs for an extra fun touch.
- Add Texture for Fur: If you want to go all out, you can use blue sprinkles or blue-colored sugar for added texture, making the cake pop look even more like Cookie Monster’s blue fur. For a fur effect, sprinkle the cake pops lightly with blue colored sugar or edible glitter after the coating has dried.
8. Let the Cake Pops Set
Once you’ve finished decorating the cake pops, let them set again in a cool area until the decoration is fully dry. The coating and decorations should firm up and stay in place without smudging.
Pro Tips for Perfect Cookie Monster Cake Pops
- Use a Styrofoam Block for Displaying: Once your cake pops are ready, display them in a Styrofoam block or a cake pop stand to prevent them from touching the surface. This helps the decoration stay intact and ensures they don’t fall over.
- Be Gentle While Dipping: Don’t rush the dipping process. Take your time to dip each cake pop carefully to avoid cracking or uneven coating. If the coating starts to set too thickly, reheat it gently.
- Customize the Eyes: Cookie Monster’s googly eyes are one of his most iconic features, so be sure to make them large and playful. If you’re working with younger children, you can pre-make the eyes out of fondant or purchase ready-made candy eyes to save time.
- Work in Small Batches: Don’t try to dip all your cake pops at once. Work in small batches to ensure the coating stays smooth and manageable.
- Refrigerate for a Short Time: Refrigerating your cake pops after they’ve been dipped helps the coating harden quicker. However, don’t leave them in the fridge too long, or the coating might crack.
Decorating with Frosting and Candies
Decorating Cookie Monster cake pops with frosting and candies is where the fun and creativity really come into play. These bite-sized treats are not just delicious—they’re also a visual delight. Whether you’re trying to replicate the Cookie Monster character’s signature look or just want to add a playful touch to your party, frosting and candies are the perfect tools to bring these cake pops to life. Here’s a step-by-step guide on how to decorate your cake pops, including ideas for creating Cookie Monster faces, adding textures, and making them even more fun with candies.
1. Start with a Base Coat of Blue Frosting or Candy Coating
The foundation of your Cookie Monster cake pops will be a smooth, even coat of blue. Since Cookie Monster is famous for his blue fur, using blue frosting or candy melts as your base is key.
- Choosing the Coating:
- Candy Melts: Candy melts are a great choice for cake pops because they melt smoothly and set quickly. They also come in a range of colors, including bright blue, which is perfect for your Cookie Monster theme.
- Frosting: If you prefer to use frosting, buttercream or cream cheese frosting works well. You can color the frosting with gel food coloring to achieve a vibrant blue shade. Keep in mind that frosting may be a little softer and more prone to smudging, so be extra careful during decoration.
- Dipping the Cake Pops:
Once your cake pops are firmly set on their sticks and the coating is prepared, dip each cake pop into the blue candy melts or frosting. Hold the stick and dip the cake pop straight into the coating, making sure it’s fully covered. Gently tap the stick to allow any excess to drip off, ensuring you have a smooth, even layer. - Drying the Base:
After the cake pops are coated, allow them to set for about 20-30 minutes in a cool area or fridge. This will help the coating harden and give you a firm base to decorate on.
2. Create the Cookie Monster Eyes
One of the most recognizable features of Cookie Monster is his large, googly eyes. Decorating your cake pops with his iconic eyes is both fun and easy!
- Making the Eyes:
There are a few different ways to create the eyes for your Cookie Monster cake pops:- Fondant: Roll out white fondant into small balls, then flatten them slightly to create round, white eyes. For the pupils, use black fondant or edible food markers to create the large, exaggerated pupils that give Cookie Monster his silly look.
- Candy Eyes: You can also purchase pre-made edible candy eyes from cake decorating stores. These are a quick and convenient way to add a perfect “googly” effect to your cake pops.
- Melted White Candy: Another option is to use white candy melts to make the eyes. Pour melted candy melts into small circles on parchment paper and let them harden. Once they’re set, attach them to the cake pop with a small dot of melted candy melt or frosting.
- Attaching the Eyes:
Once your eyes are ready, place them on the top of each cake pop. Secure them gently with a small dab of frosting or melted candy melts to ensure they stay in place. For that signature Cookie Monster look, place the eyes slightly apart and off-center.
3. Create Cookie Monster’s Mouth and Smile
Cookie Monster is known for his wide, goofy grin, so adding a mouth to your cake pops is a must!
- Using Icing or Fondant:
To create a smiling mouth, use black royal icing or black fondant. You can pipe the icing into a curved line to form a wide, happy mouth or use a small piece of black fondant shaped like a mouth.- Royal Icing: If you’re using royal icing, prepare it to a thick consistency so it holds its shape. Pipe a curved line across the bottom of the cake pop to create the mouth. For an extra touch, you can add a “cookie-bite” effect at the edge of the mouth to mimic Cookie Monster eating a cookie.
- Fondant: If you prefer fondant, roll out a small piece of black fondant and cut it into the shape of a wide smile. You can place it directly on the cake pop, securing it with a tiny bit of frosting.
- Adding Extra Detail:
For an added touch, you can pipe tiny “cookie crumbs” around the edges of the mouth to show Cookie Monster has been munching on his favorite treat. You can do this by crushing some cookies (like Oreos) and sprinkling them around the mouth or sticking small cookie bits into the fondant smile.
4. Add the Signature Cookies
What would Cookie Monster be without his beloved cookies? Adding small cookie decorations to your cake pops is an easy way to elevate the look and emphasize the Cookie Monster theme.
- Mini Chocolate Chip Cookies:
You can top your cake pops with mini chocolate chip cookies or use cookie crumbs to add texture. These can be bought pre-made or made from scratch. Simply place a mini cookie on top of each cake pop, right above the mouth, to make it look like Cookie Monster is munching away. If you want to be extra creative, you can make the cookies look like they’re being “eaten” by creating cookie bites on the edges. - Crushed Cookies:
For a fun, textured look, roll your cake pops in crushed cookies (such as Oreos or graham crackers) after they’ve been dipped in the blue coating. This will give your cake pops a “furry” appearance, resembling Cookie Monster’s blue, shaggy fur. It’s also a fun way to add extra flavor and crunch to each bite. - Mini Cookie Shapes:
You can also use fondant to create small, cookie-shaped decorations. Roll out brown fondant and cut out tiny cookie shapes using a cookie cutter. Place them on the cake pops and decorate with tiny chocolate chips (either using brown fondant or mini chocolate chips) for that authentic Cookie Monster touch.
5. Add Texture to Mimic Fur
Cookie Monster’s fluffy, shaggy fur is an essential part of his look. By adding texture to your cake pops, you can make them even more realistic and fun.
- Sprinkles:
After the cake pop has been dipped in blue coating, you can roll it in blue sprinkles or blue-colored sugar for added texture. This will give the appearance of Cookie Monster’s “fur” and provide a little crunch to each bite. For an even fluffier effect, opt for larger sprinkles or textured sugars. - Shredded Coconut:
If you’re aiming for a softer texture, consider using shredded coconut. You can dye the coconut blue with a few drops of food coloring, then roll your cake pops in it to add a “furry” effect. Shredded coconut also adds a mild flavor that pairs nicely with the sweetness of the cake pop. - Piping Fur with Icing:
If you want to go all out, you can pipe fur-like details around the edges of the cake pop using royal icing. Use a piping bag with a star tip to create a textured, fur-like effect around the edges. This method requires a steady hand, but it can really make your cake pops stand out!
6. Final Touches and Displaying Your Cake Pops
After decorating your cake pops with eyes, mouth, cookies, and texture, it’s time to add the final touches and display them for your guests.
- Use Edible Glitter or Food Color:
To make your cake pops extra eye-catching, you can sprinkle a little edible glitter on top for a fun, festive touch. You can also use food coloring pens to draw additional details on the cake pops, like Cookie Monster’s nose or extra decoration around the eyes. - Display Your Cake Pops:
To ensure your cake pops look their best and are easy to serve, display them in a cake pop stand or a decorative container. You can also place them in a Styrofoam block, which will keep the cake pops upright and prevent them from falling over. You could even create a themed stand, like a Cookie Monster “cookie jar” or a dessert table with Cookie Monster decorations. - Refrigerate to Set:
If needed, place your finished cake pops in the fridge for about 10-15 minutes to allow the decorations to fully set and harden. This will help ensure the frosting and candies stay in place without smudging when you serve them.
Serving Ideas
Serving Cookie Monster cake pops goes beyond simply handing them out. Presentation plays a huge role in making these treats even more delightful and fun for your guests. Whether you’re serving them at a birthday party, a themed event, or a casual gathering, there are endless ways to present and serve your Cookie Monster cake pops to make them an unforgettable part of the celebration.
1. Displaying Cake Pops on a Cake Pop Stand
A dedicated cake pop stand is a fantastic way to showcase your creations and ensure they’re easy for guests to grab and enjoy. This display not only keeps the cake pops organized but also adds a decorative touch to your dessert table.
- Themed Cake Pop Stand: For a Cookie Monster theme, consider using a stand that fits the theme. You can create a makeshift “cookie jar” by using a large glass jar and placing cake pops inside, mimicking Cookie Monster’s love for cookies. Alternatively, you can use a tiered stand with a Cookie Monster figurine or themed decorations around the base to enhance the look.
- DIY Cake Pop Stand: If you prefer a more creative approach, you can make your own cake pop stand using Styrofoam or floral foam. Cover the foam with blue wrapping paper or fabric to match the Cookie Monster theme, and stick the cake pops directly into the foam. This option is customizable and can be made to suit the size of your cake pops.
- Display with Fun Signs: Add a cute touch by placing small signs next to the cake pop stand that say something like “Cookie Monster’s Cookie Pops” or “Munch on a Cookie Monster Cake Pop!” It reinforces the theme and adds charm to the dessert table.
2. Cookie Monster-Themed Dessert Table
A dessert table centered around Cookie Monster-themed treats can turn your cake pops into the star of the show. By incorporating other themed desserts and decorations, you’ll create a cohesive look that’s fun and exciting for your guests.
- Include Cookie Monster Cookies: Pair your cake pops with freshly baked cookies. Chocolate chip cookies are a natural fit for the theme, and you can use cookie cutters to shape them like Cookie Monster’s face, or even top them with fondant eyes and smiles to match your cake pops.
- Themed Cupcakes and Cakes: In addition to cake pops, serve cupcakes or a larger Cookie Monster cake decorated in the same style. The cupcakes can be topped with blue frosting and Cookie Monster’s signature eyes, creating a unified dessert table that complements the cake pops.
- Cookie Monster Cake Balls: If you want more bite-sized options, serve cake balls alongside your cake pops. Cake balls are similar to cake pops but without sticks, and they can be decorated in the same way to keep the theme consistent.
- Colorful Tablecloth and Backdrops: Use a blue tablecloth to match Cookie Monster’s fur color, and consider adding a Cookie Monster backdrop behind the dessert table for a fun photo opportunity. Add Cookie Monster plush toys or figurines as additional decorations to make the space come alive.
3. Serve Cake Pops in Mini Cookie Jars
For a more whimsical serving idea, place each Cookie Monster cake pop in its own mini cookie jar or glass jar. This idea adds a fun, interactive element to serving your cake pops and makes them feel even more like a special treat.
- Mini Cookie Jars: These small glass jars can be found at craft stores, and they are perfect for displaying cake pops. You can fill the bottom of each jar with a few mini chocolate chip cookies or cookie crumbs, then place the cake pop inside, resting it on the rim of the jar.
- Customization: Tie a small blue ribbon or a tag around the lid of each jar to add a personalized touch. You can even write the guest’s name on the tag to make it feel like a party favor.
- Packaging for Takeaway: These mini cookie jars can also double as party favors. Guests can take home their cake pops in the jars, which adds a thoughtful, functional element to your party. If you’re hosting a large event, this could be a great way to let guests take home a treat.
4. Cake Pops as Party Favors
Cake pops make fantastic party favors, and they’re easy to pack up for guests to take home. If you want to send your guests off with a delicious and fun memento from your event, wrapping cake pops in creative packaging is a great option.
- Cellophane Bags: Use clear cellophane bags to wrap each cake pop. Tie the top with a ribbon that matches your theme—blue for Cookie Monster. You can add a tag with the guest’s name for a personalized touch.
- Mini Gift Boxes: For an extra-special presentation, place the wrapped cake pops in small, decorative gift boxes. These could be simple white or blue boxes with Cookie Monster stickers or small plush figures attached to the top. This works especially well if you’re having a Cookie Monster-themed birthday party or celebration.
- Party Favor Table: Set up a party favor table where guests can pick up their individually wrapped cake pops as they leave. This adds a sweet end to the event and ensures that everyone gets to enjoy the treats at their leisure.
5. Serving Cake Pops in Ice Cream Cones
For a fun twist, serve your Cookie Monster cake pops inside ice cream cones. This playful presentation adds an unexpected touch and makes the cake pops even more enjoyable.
- Mini Ice Cream Cones: Use mini waffle cones or sugar cones as the base. Simply place the cake pop stick into the cone so that the cake pop stands upright. This makes it look like a mini ice cream sundae and is perfect for a summer event or casual gathering.
- Decorate the Cones: You can decorate the cones with blue icing, sprinkles, or even drizzle some chocolate syrup to enhance the look. This makes the entire treat feel like a whimsical ice cream creation that’s perfect for a Cookie Monster theme.
- Serve with Cookie Crumbs: To make the treat even more fun, you can fill the bottom of the cones with cookie crumbs or mini cookies. This creates the effect of a “cookie-filled” cone, enhancing the Cookie Monster theme even more.
6. Cookie Monster-Themed Drink Station
Create a drink station that complements your Cookie Monster cake pops, so guests have a full Cookie Monster experience. A fun drink station can provide beverages that tie into the theme while making the event even more interactive.
- Blue Drinks: Serve blue-colored drinks, like blueberry lemonade, blue punch, or blue soda, in clear cups to keep the Cookie Monster theme intact. You can add Cookie Monster-themed straws (such as straws with little Cookie Monster faces) to add extra fun.
- Cookie Monster Milkshakes: If you want to serve something a bit more indulgent, offer blue milkshakes or smoothies as a fun, themed drink. You can add whipped cream and even top them with a mini cookie for an extra Cookie Monster touch.
- Decorate the Drink Station: Use Cookie Monster-themed cups, napkins, and tablecloths to keep the drink station cohesive. You could also add Cookie Monster plush toys or printed signs that say “Cookie Monster’s Drink Station” to add some personality to the setup.
7. Create a Cookie Monster Cake Pop Buffet
If you’re hosting a large event or party, consider creating a buffet-style display of cake pops, where guests can pick and choose their favorite varieties. This idea is perfect for large celebrations or themed parties with many guests.
- Variety of Cake Pops: In addition to the traditional Cookie Monster cake pops, offer a few variations, such as cake pops decorated with different colors, or those with different cookie fillings (chocolate chip, Oreos, etc.). This way, guests can sample different flavors or textures while enjoying the theme.
- Creative Cake Pop Stations: If you have the time and resources, you can even create a “build-your-own” cake pop station, where guests can decorate their own cake pops using various toppings like candy eyes, sprinkles, cookie crumbs, and colored frosting. This interactive experience makes the dessert even more memorable.
Certainly! Here’s an expanded version of the H3: Serving Ideas section for your blog post, focusing on creative and practical ways to present and serve Cookie Monster cake pops at your event. These ideas will help you elevate your Cookie Monster theme and make the treats even more enjoyable for your guests.
H3: Serving Ideas
Serving Cookie Monster cake pops goes beyond simply handing them out. Presentation plays a huge role in making these treats even more delightful and fun for your guests. Whether you’re serving them at a birthday party, a themed event, or a casual gathering, there are endless ways to present and serve your Cookie Monster cake pops to make them an unforgettable part of the celebration.
1. Displaying Cake Pops on a Cake Pop Stand
A dedicated cake pop stand is a fantastic way to showcase your creations and ensure they’re easy for guests to grab and enjoy. This display not only keeps the cake pops organized but also adds a decorative touch to your dessert table.
- Themed Cake Pop Stand: For a Cookie Monster theme, consider using a stand that fits the theme. You can create a makeshift “cookie jar” by using a large glass jar and placing cake pops inside, mimicking Cookie Monster’s love for cookies. Alternatively, you can use a tiered stand with a Cookie Monster figurine or themed decorations around the base to enhance the look.
- DIY Cake Pop Stand: If you prefer a more creative approach, you can make your own cake pop stand using Styrofoam or floral foam. Cover the foam with blue wrapping paper or fabric to match the Cookie Monster theme, and stick the cake pops directly into the foam. This option is customizable and can be made to suit the size of your cake pops.
- Display with Fun Signs: Add a cute touch by placing small signs next to the cake pop stand that say something like “Cookie Monster’s Cookie Pops” or “Munch on a Cookie Monster Cake Pop!” It reinforces the theme and adds charm to the dessert table.
2. Cookie Monster-Themed Dessert Table
A dessert table centered around Cookie Monster-themed treats can turn your cake pops into the star of the show. By incorporating other themed desserts and decorations, you’ll create a cohesive look that’s fun and exciting for your guests.
- Include Cookie Monster Cookies: Pair your cake pops with freshly baked cookies. Chocolate chip cookies are a natural fit for the theme, and you can use cookie cutters to shape them like Cookie Monster’s face, or even top them with fondant eyes and smiles to match your cake pops.
- Themed Cupcakes and Cakes: In addition to cake pops, serve cupcakes or a larger Cookie Monster cake decorated in the same style. The cupcakes can be topped with blue frosting and Cookie Monster’s signature eyes, creating a unified dessert table that complements the cake pops.
- Cookie Monster Cake Balls: If you want more bite-sized options, serve cake balls alongside your cake pops. Cake balls are similar to cake pops but without sticks, and they can be decorated in the same way to keep the theme consistent.
- Colorful Tablecloth and Backdrops: Use a blue tablecloth to match Cookie Monster’s fur color, and consider adding a Cookie Monster backdrop behind the dessert table for a fun photo opportunity. Add Cookie Monster plush toys or figurines as additional decorations to make the space come alive.
3. Serve Cake Pops in Mini Cookie Jars
For a more whimsical serving idea, place each Cookie Monster cake pop in its own mini cookie jar or glass jar. This idea adds a fun, interactive element to serving your cake pops and makes them feel even more like a special treat.
- Mini Cookie Jars: These small glass jars can be found at craft stores, and they are perfect for displaying cake pops. You can fill the bottom of each jar with a few mini chocolate chip cookies or cookie crumbs, then place the cake pop inside, resting it on the rim of the jar.
- Customization: Tie a small blue ribbon or a tag around the lid of each jar to add a personalized touch. You can even write the guest’s name on the tag to make it feel like a party favor.
- Packaging for Takeaway: These mini cookie jars can also double as party favors. Guests can take home their cake pops in the jars, which adds a thoughtful, functional element to your party. If you’re hosting a large event, this could be a great way to let guests take home a treat.
4. Cake Pops as Party Favors
Cake pops make fantastic party favors, and they’re easy to pack up for guests to take home. If you want to send your guests off with a delicious and fun memento from your event, wrapping cake pops in creative packaging is a great option.
- Cellophane Bags: Use clear cellophane bags to wrap each cake pop. Tie the top with a ribbon that matches your theme—blue for Cookie Monster. You can add a tag with the guest’s name for a personalized touch.
- Mini Gift Boxes: For an extra-special presentation, place the wrapped cake pops in small, decorative gift boxes. These could be simple white or blue boxes with Cookie Monster stickers or small plush figures attached to the top. This works especially well if you’re having a Cookie Monster-themed birthday party or celebration.
- Party Favor Table: Set up a party favor table where guests can pick up their individually wrapped cake pops as they leave. This adds a sweet end to the event and ensures that everyone gets to enjoy the treats at their leisure.
5. Serving Cake Pops in Ice Cream Cones
For a fun twist, serve your Cookie Monster cake pops inside ice cream cones. This playful presentation adds an unexpected touch and makes the cake pops even more enjoyable.
- Mini Ice Cream Cones: Use mini waffle cones or sugar cones as the base. Simply place the cake pop stick into the cone so that the cake pop stands upright. This makes it look like a mini ice cream sundae and is perfect for a summer event or casual gathering.
- Decorate the Cones: You can decorate the cones with blue icing, sprinkles, or even drizzle some chocolate syrup to enhance the look. This makes the entire treat feel like a whimsical ice cream creation that’s perfect for a Cookie Monster theme.
- Serve with Cookie Crumbs: To make the treat even more fun, you can fill the bottom of the cones with cookie crumbs or mini cookies. This creates the effect of a “cookie-filled” cone, enhancing the Cookie Monster theme even more.
6. Cookie Monster-Themed Drink Station
Create a drink station that complements your Cookie Monster cake pops, so guests have a full Cookie Monster experience. A fun drink station can provide beverages that tie into the theme while making the event even more interactive.
- Blue Drinks: Serve blue-colored drinks, like blueberry lemonade, blue punch, or blue soda, in clear cups to keep the Cookie Monster theme intact. You can add Cookie Monster-themed straws (such as straws with little Cookie Monster faces) to add extra fun.
- Cookie Monster Milkshakes: If you want to serve something a bit more indulgent, offer blue milkshakes or smoothies as a fun, themed drink. You can add whipped cream and even top them with a mini cookie for an extra Cookie Monster touch.
- Decorate the Drink Station: Use Cookie Monster-themed cups, napkins, and tablecloths to keep the drink station cohesive. You could also add Cookie Monster plush toys or printed signs that say “Cookie Monster’s Drink Station” to add some personality to the setup.
7. Create a Cookie Monster Cake Pop Buffet
If you’re hosting a large event or party, consider creating a buffet-style display of cake pops, where guests can pick and choose their favorite varieties. This idea is perfect for large celebrations or themed parties with many guests.
- Variety of Cake Pops: In addition to the traditional Cookie Monster cake pops, offer a few variations, such as cake pops decorated with different colors, or those with different cookie fillings (chocolate chip, Oreos, etc.). This way, guests can sample different flavors or textures while enjoying the theme.
- Creative Cake Pop Stations: If you have the time and resources, you can even create a “build-your-own” cake pop station, where guests can decorate their own cake pops using various toppings like candy eyes, sprinkles, cookie crumbs, and colored frosting. This interactive experience makes the dessert even more memorable.
8. Fun Cookie Monster Party Games with Cake Pops
Incorporate cake pops into party games or activities to add an extra level of fun to your event.
- Cake Pop Toss: Set up a “cake pop toss” game where guests try to throw cake pops into a large jar or container. You could use a giant Cookie Monster head as the target, adding a visual element to the game.
- Cookie Monster Pinata: Fill a Cookie Monster-themed piñata with cake pops along with other treats. As guests hit the piñata, they can pull out the cake pops as a fun surprise.
Conclusion: Bring Your Cookie Monster Cake to Life
Bringing a Cookie Monster cake to life is about more than just the final product—it’s about embracing creativity, having fun with the decorating process, and sharing those playful moments with friends and family. Whether you’re crafting a full-sized cake, cake pops, cupcakes, or even cookies, the possibilities are endless when it comes to adding your own personal touch to the theme.
A Cookie Monster cake isn’t just a dessert; it’s an experience. It’s about delighting guests with a whimsical twist on a beloved character that transcends generations. As one of the most iconic characters from Sesame Street, Cookie Monster holds a special place in many hearts, making him the perfect centerpiece for a birthday party, baby shower, or even a casual get-together.
From the moment you start planning and preparing, to the satisfaction of seeing your friends and family’s smiles as they admire (and devour!) your creations, bringing Cookie Monster to life through cake and treats is an incredibly rewarding experience. The combination of his playful personality and love for cookies opens up a world of creative possibilities for decorators of all skill levels. Whether you keep it simple with basic cake pops or go all out with a multi-layered cake covered in fondant, every step is an opportunity to infuse joy into your celebration.
Here are a few key takeaways to help you successfully bring your Cookie Monster cake to life:
- Be Playful with the Design: Cookie Monster’s lovable, silly expression and vibrant blue “fur” provide endless opportunities for playful decoration. Don’t be afraid to experiment with different textures, colors, and materials, like fondant, frosting, and candies, to create a visually stunning dessert.
- Personalize Your Creation: Whether you’re using store-bought cake mix or creating everything from scratch, adding your personal flair—whether through cookies, unique toppings, or fun variations—will make your cake pop even more special. The little details (like the way you decorate the eyes or add mini cookies) can make all the difference in how much your guests enjoy the experience.
- Engage Your Guests: If you’re hosting a party, consider making your Cookie Monster cake pops or cake the center of an interactive experience. Have a DIY cake pop station, or let your guests decorate their own with frosting, candies, and edible glitter. This not only adds a hands-on element but also encourages creativity and fun.
- Choose a Theme That Works: Whether you’re combining the Cookie Monster treats with other Sesame Street characters, a full blue and yellow color scheme, or even mixing in a few cookie-themed items, creating a cohesive and fun dessert table will bring the character and the party to life in a way that guests will remember.
- Enjoy the Process: Don’t forget to have fun during the preparation. Baking and decorating should be a joy, not a chore, so take your time, get creative, and enjoy every step of the process. After all, a Cookie Monster cake is all about the playful, fun-loving spirit of the character—and that should shine through in every step of the creation.
A Lasting Impression
No matter the size or complexity of your cake, one thing is certain: a Cookie Monster-themed dessert will create lasting memories and bring smiles to every face. The combination of whimsical design, delicious treats, and a beloved character makes the Cookie Monster cake an unforgettable addition to any celebration. By following the tips and ideas in this post, you can create a cake that’s not only visually stunning but also filled with love, laughter, and a whole lot of cookies.
So, grab your ingredients, get creative, and let Cookie Monster inspire you to bake up something truly special. Whether you’re crafting the perfect Cookie Monster cake or adorning your cake pops with playful designs, your celebration is sure to be a hit, leaving everyone craving more of those iconic cookies (and cake)!
1 thought on “Top 5 Cookie Monster Cake Tutorials You Need to Try”